In addition to using registration forms, you can upload registration information directly to EventHub and send emails leading to the event page (video viewing page). This feature can be used when you want to use another system's registration form instead of EventHub's forms.
Users who have been registered through Excel will receive an email inviting them to the event page, and they will only need to set a password to enter. There will be no need for the user to enter their information twice.
<tips>When uploading user information through Excel, there is no step to confirm agreement to Terms of Service. Please make sure you read this article on handling participant information before you proceed.</tips>
1. Upload an exhibitor list
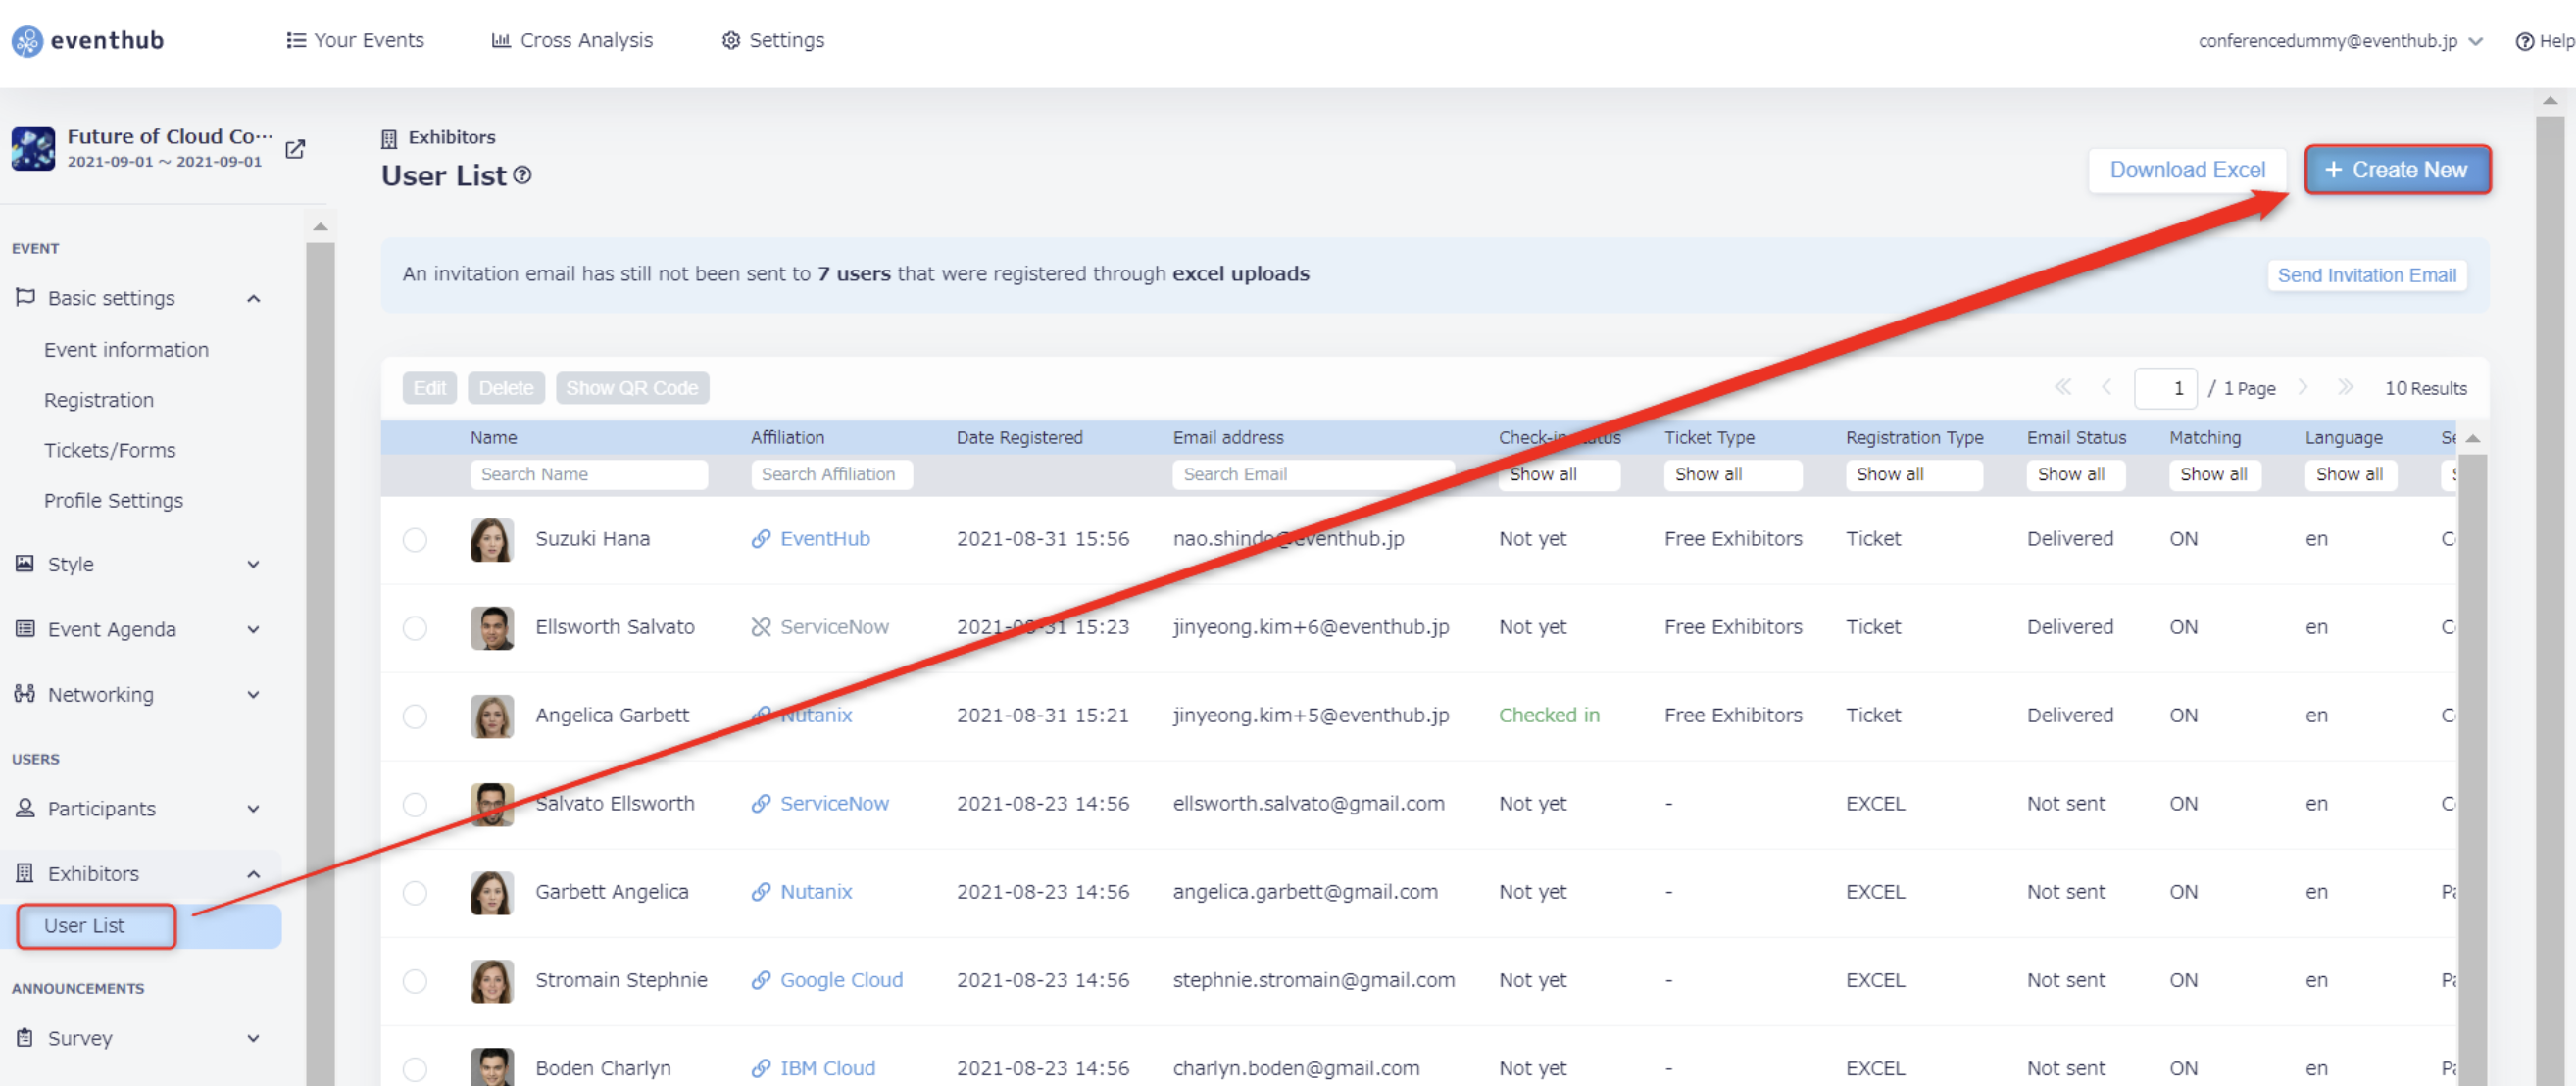
1. Select 'Create new' from the User List page.
2. Select 'Upload template'
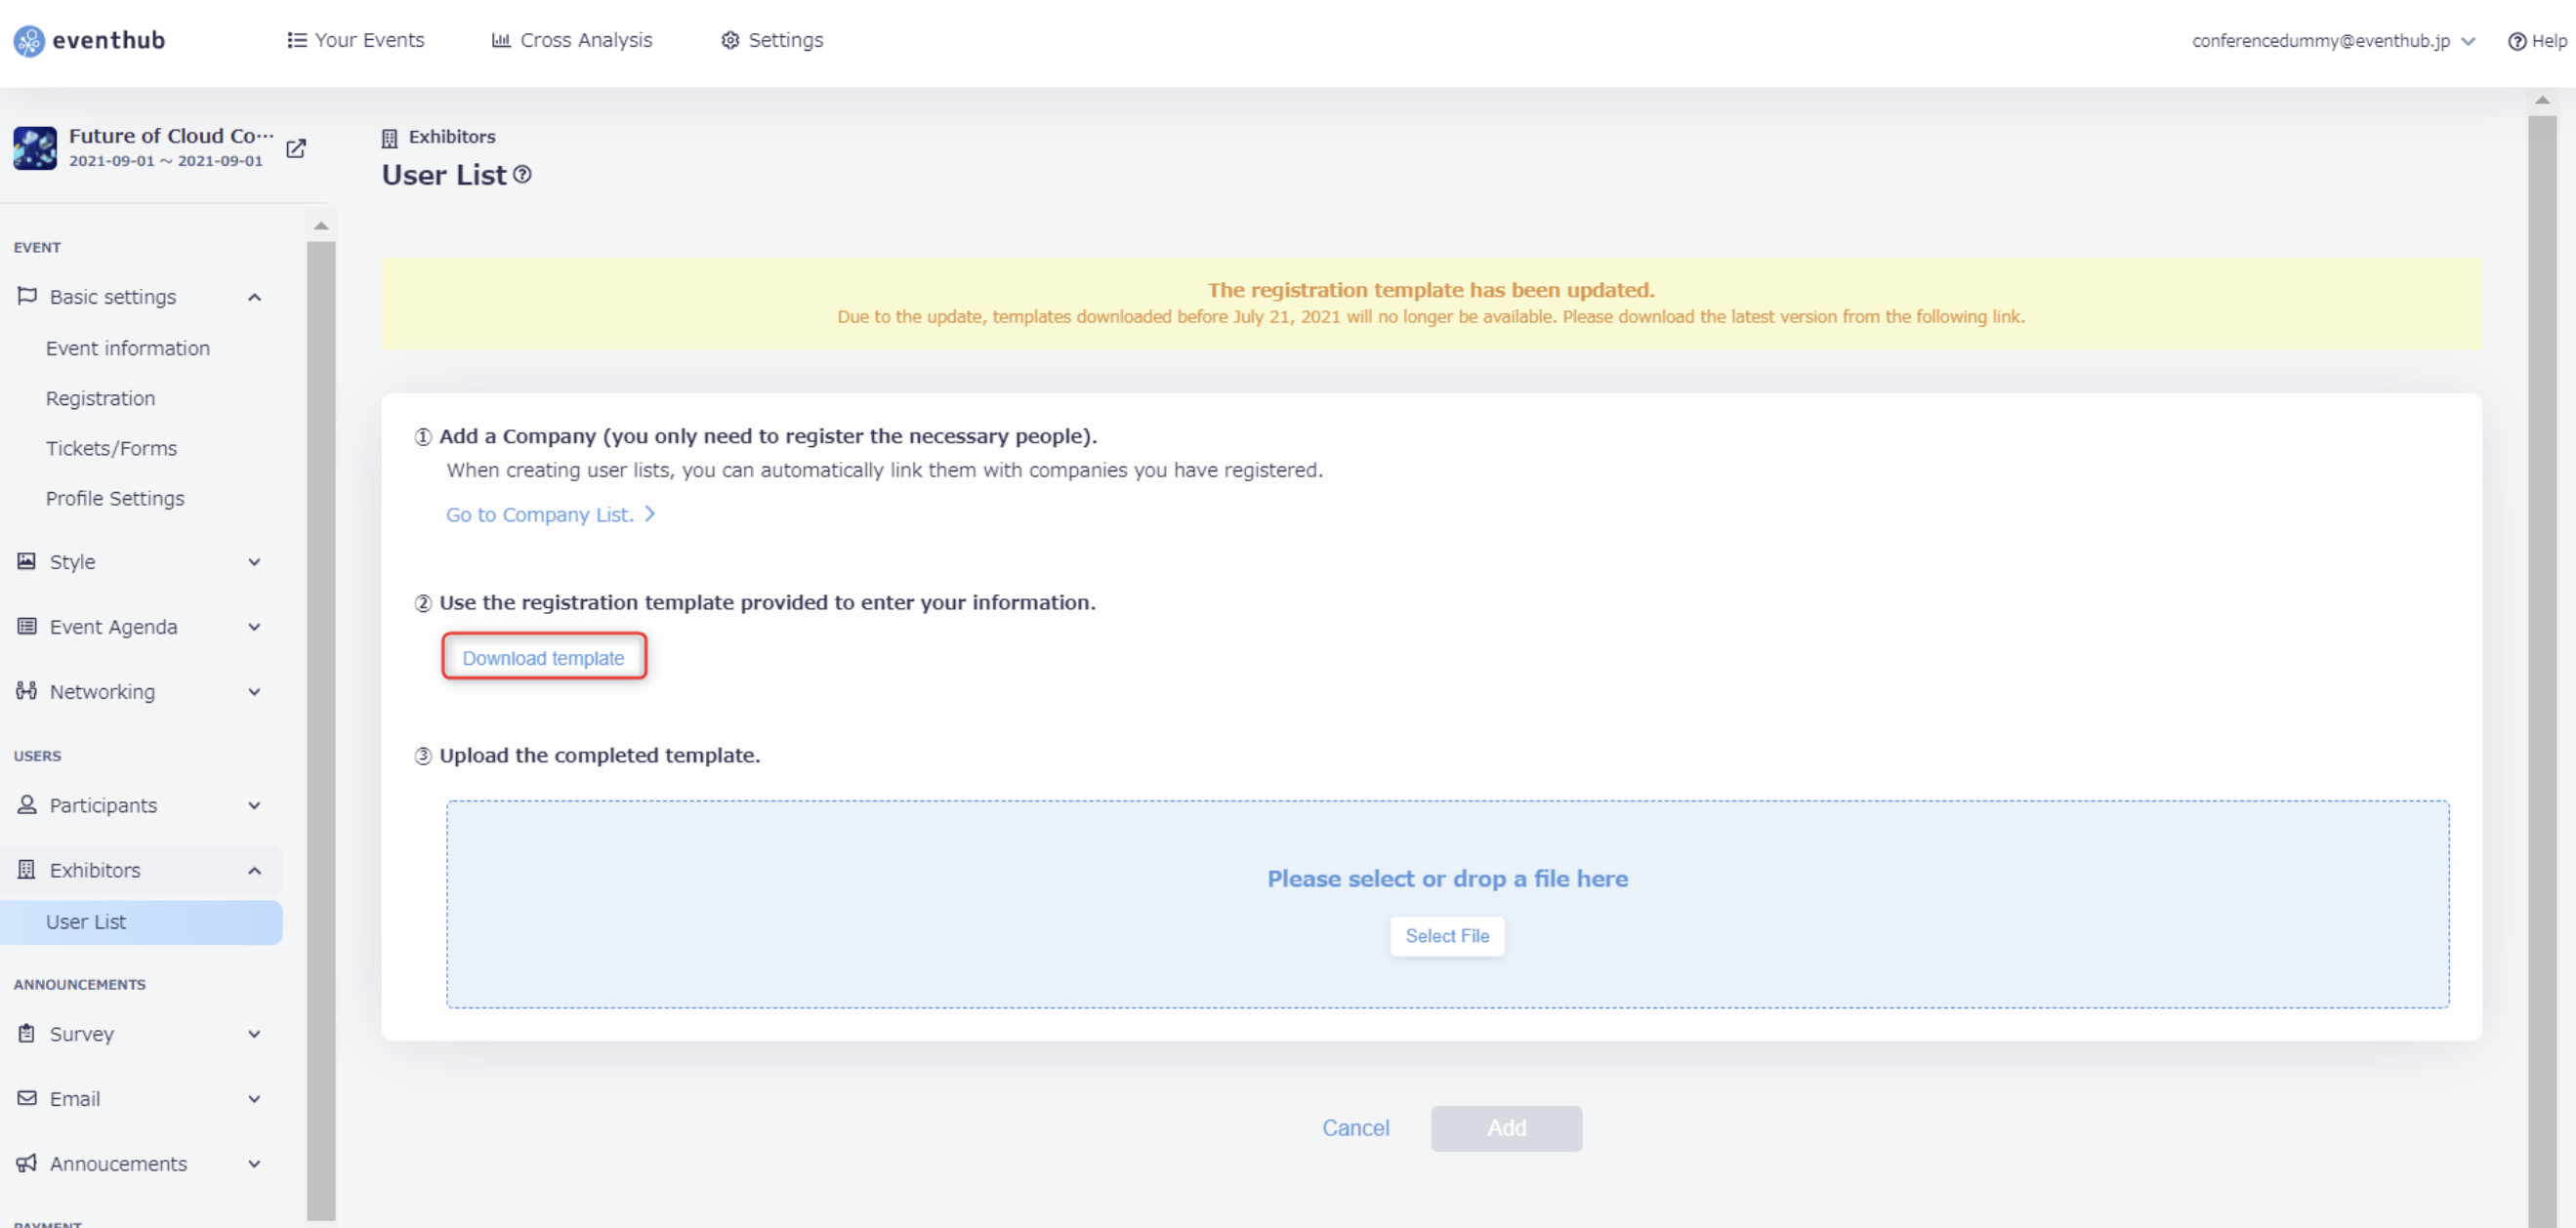
3. Open the Excel template downloaded to your device. After filling out the necessary information, save your file.
*When filling out information, follow the instructions written on the 'Description' tab.

Description
※You can also see this information on the Excel spreadsheet
| Item Name | Optional/Required | Description/Points to note |
| Email address | Optional/Required | Please enter the user's email address. Email addresses are not published on EventHub's website but are necessary for sending invitations and notification emails. Users are identified by their email address. You cannot upload the same email address twice, so please be careful not to have duplicate email addresses. Users with a blank cell in the email address column cannot be uploaded. |
| Language | Required | (Japanese: ja, English: en) Please set the desired language of emails to be sent to the user. If set to English, the user will receive notification emails in English and links to English pages after logging in. However, the event page's language depends on the browser and is unaffected by this setting." |
| Last Name | Required | Please enter last name. |
| First Name | Required | Please enter first name. |
| Affiliation | Optional/Required | Please enter company name or organization |
| Department or Division | Optional/Required | Please enter department or division. |
| Occupation or Title | Optional/Required | Please enter occupation or title. |
| Meeting Room Group | Required | Set to "default" if you do not plan on using the Meeting Room Group feature. |
| Search Group Name | Required | Set to "default" if you do not plan on using the Search Group feature. |
| Free-text (Field Name from Profile Settings will be used) | Optional/Required | Character Limits: Free-text (one line, up to 100 characters) Free-text (multiple rows, up to 2000 characters) |
| Checkbox (Field Name from Profile Settings will be used) | Optional/Required | Use ; (double semi-colon) to separate values if you wish to set this (multiple-choice) |
| Radio/Pulldown (Field Name from Profile Settings will be used) | Optional/Required | Set if desired (single-choice). |
<attention>・The template fields cannot be edited.
・You will not be able to upload the document if there are required fields that have not been filled in.
・If you have created a pull-down menu in 'Basic Settings' > 'Profile Settings', please make sure to enter the same wording as used in the options on the pull-down.</attention>
4. After clicking 'Create New', click 'Select File' and upload the Excel spreadsheet.
*Ensure your Excel file has been named "exhibitor".

5. Check the correct file has been entered and click 'Add' to upload your spreadsheet.

<tips>If there are any errors in the Excel file, you will not be able to upload it. If an error message appears, it may not state what the specific issue is, so please check the following points and try to upload your file again.
- Are there any unnecessary extra sheets or columns?
- Are there any unnecessary spaces? Any spaces that exist in the profile fields must also be entered in the Excel. If there are any missing, an error will occur.
- Are all of the email address correct, and don't contain any extra characters or symbols?
- Is your Excel named "participant"?</tips>
If you are uploading more than once, you won't have to delete the information you previously entered. EventHub uses your email address to check that you are not uploading duplicate information.
2. Sending invitation emails
After uploading the Excel file, a notice will be displayed above the User List stating how many participants have yet to be sent their invitation email. You can click the button to the right of the notice to send emails.

Participant information will be registered in the database by uploading the Excel file, however the invitation email will not have been sent to the users yet, so you can do this by clicking the 'Send invitation email' button in the top right of the screen. The users can access the log in screen from the URL in the invitation email, and will be directed to set up their password so that they can access the event.