You can limit visibility between certain groups by dividing participants into Search Groups. For example, if you set the groups in such a way, users belonging to Group A will not be able to network with or see the information of users belonging to Group B.
Contents
1. Create a search group
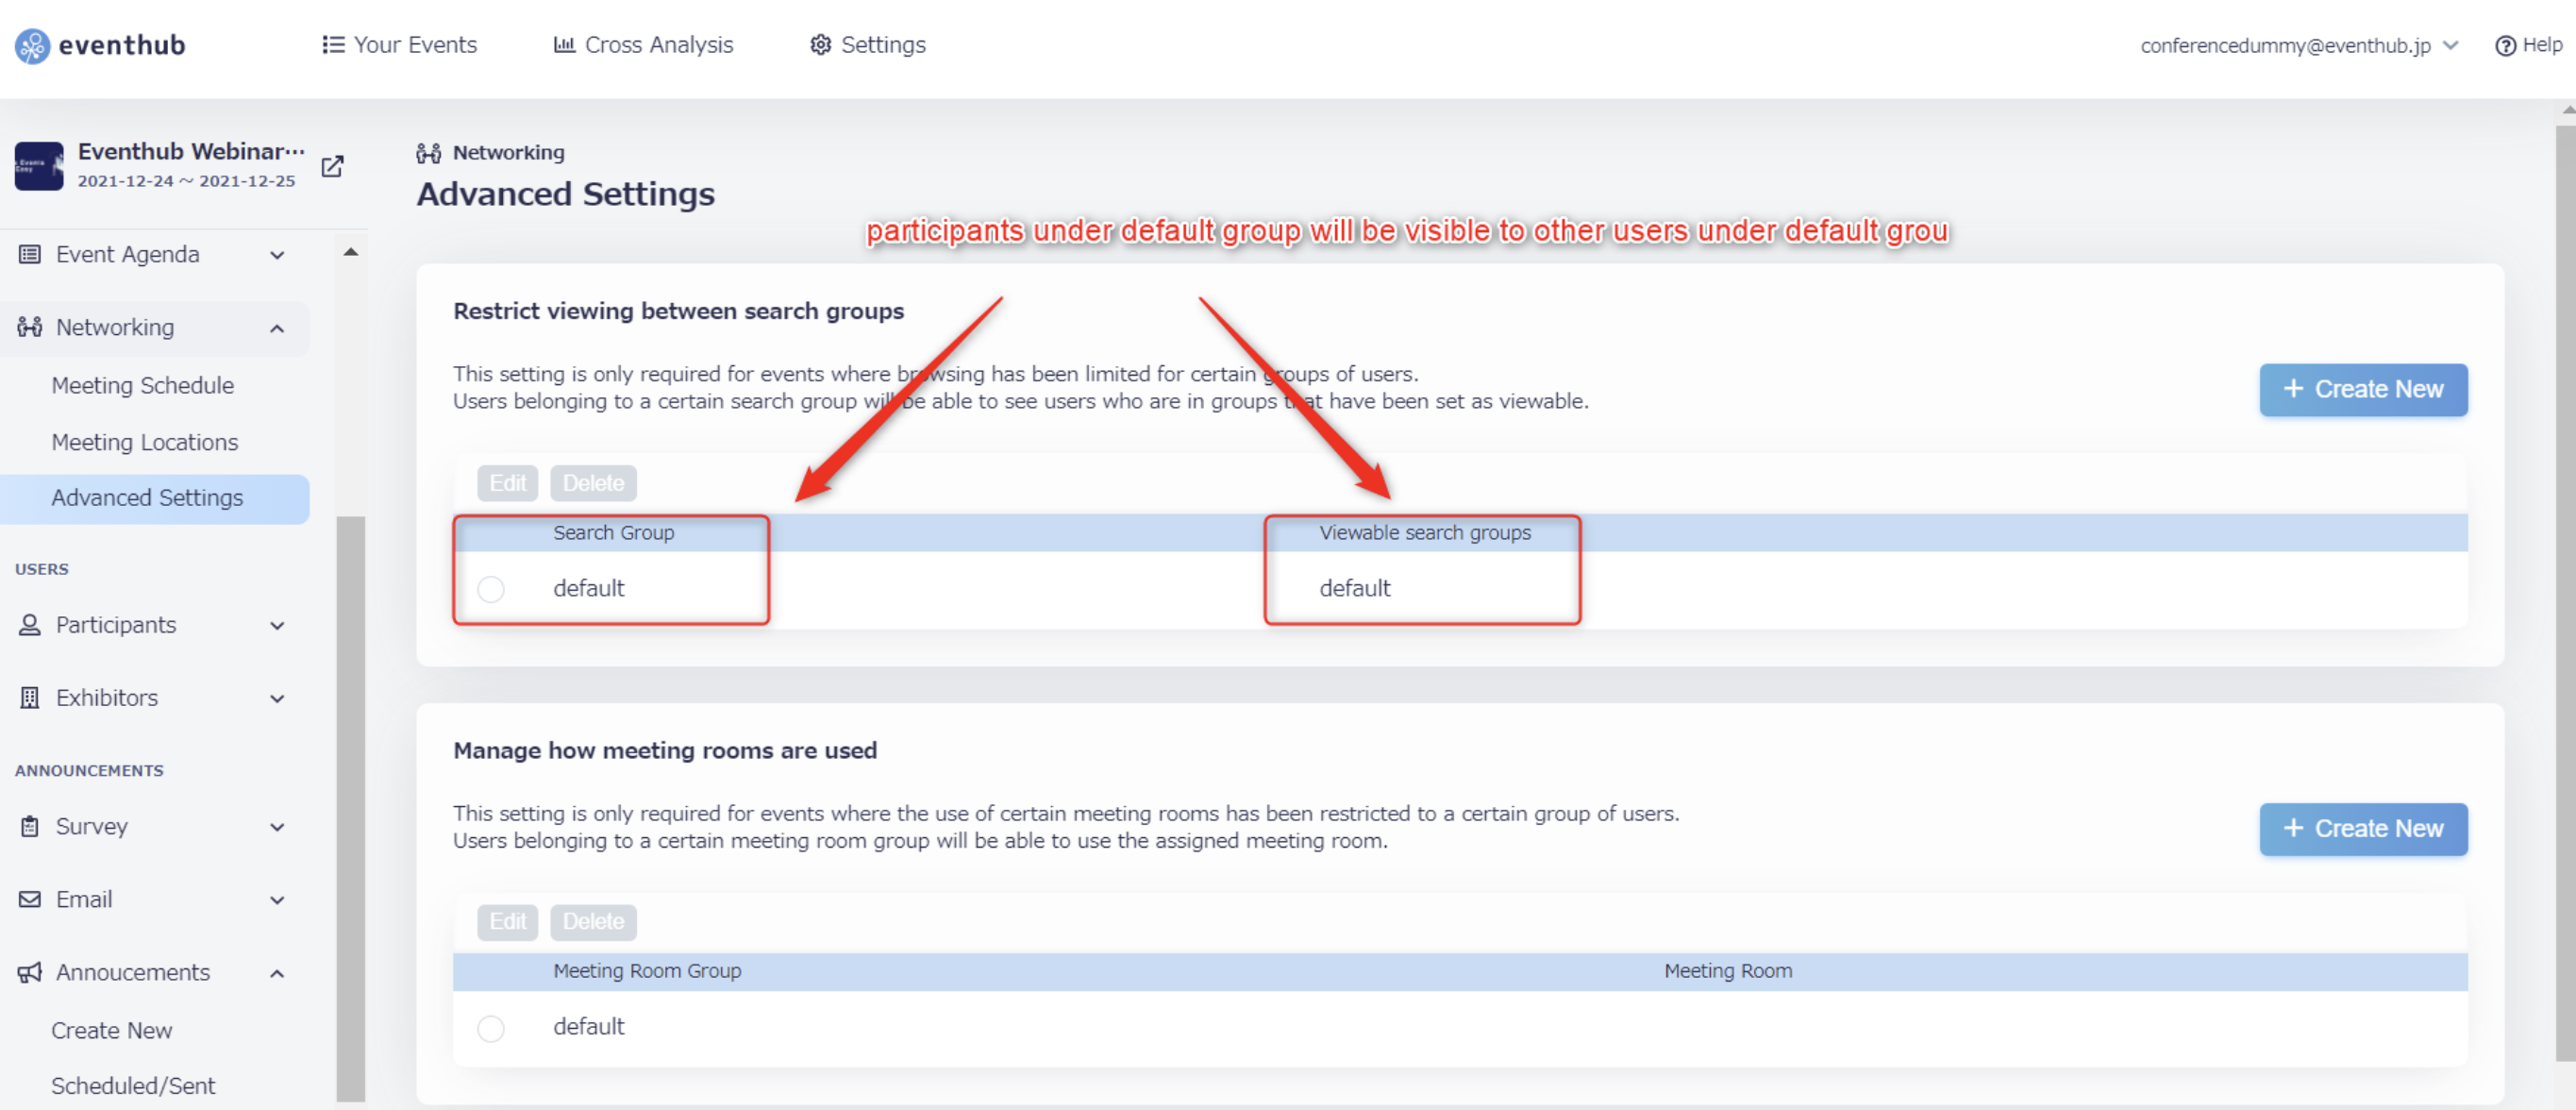
If settings have not been adjusted, all search group settings will be set to 'default'. As the basic setting, all registered participants will be placed in the default group and will be visible to all other users.
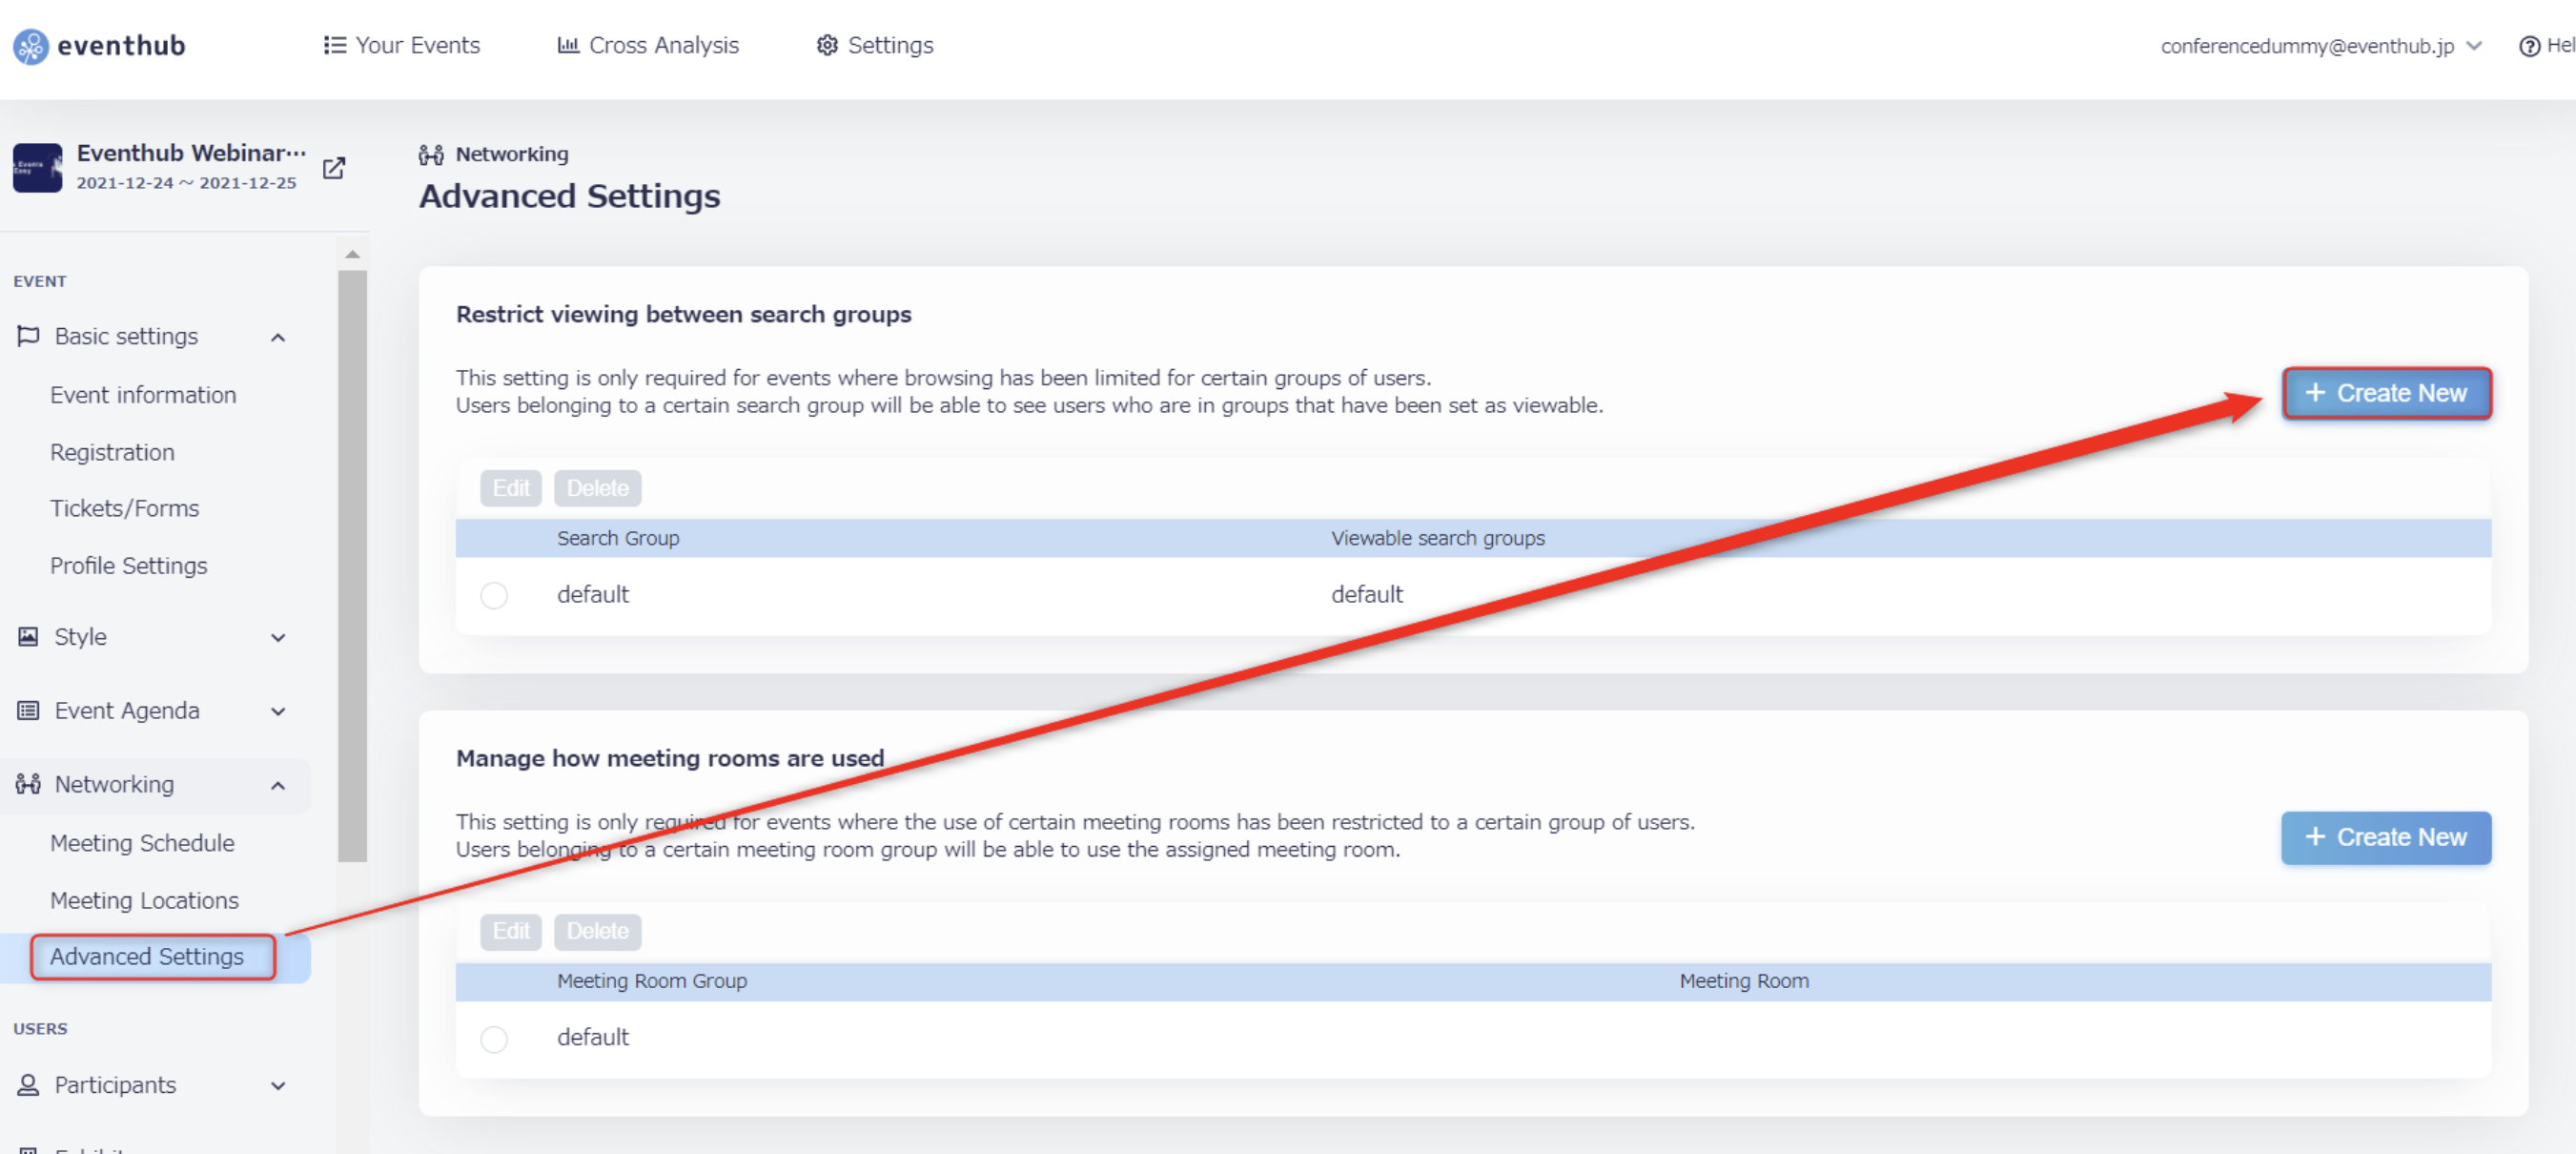
1. To create a search group, click 'Create New'.
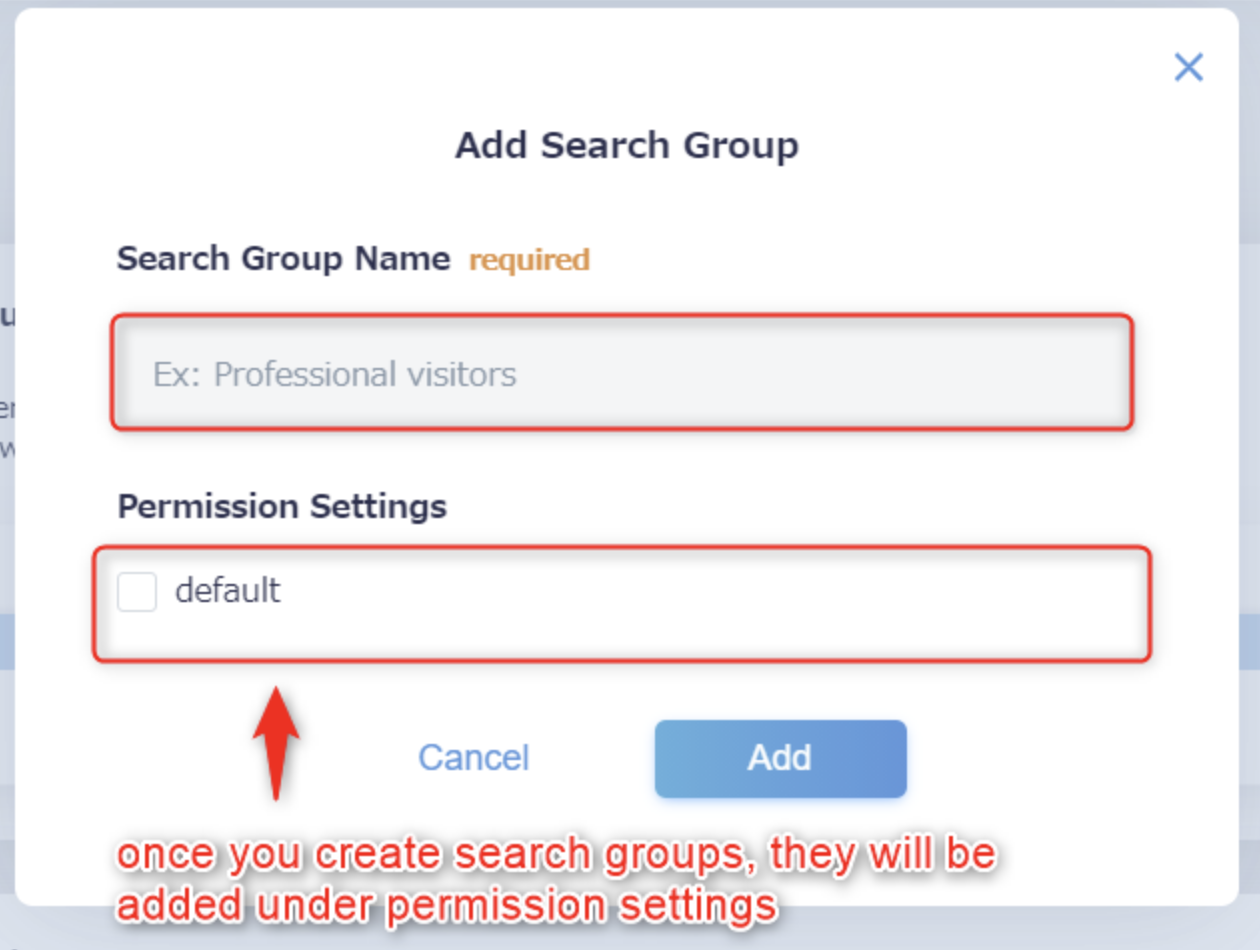
2. Enter the 'Search group name'. This name will not be visible to participants so please enter any name you like. The search groups you create will be added as options under 'Permission Settings'. You don't need to configure any settings if this is the first time you're creating a search group. It's best to set the permission settings after you have already created all of the search groups.
Once you've added the search group name, click 'Add' to save your settings.
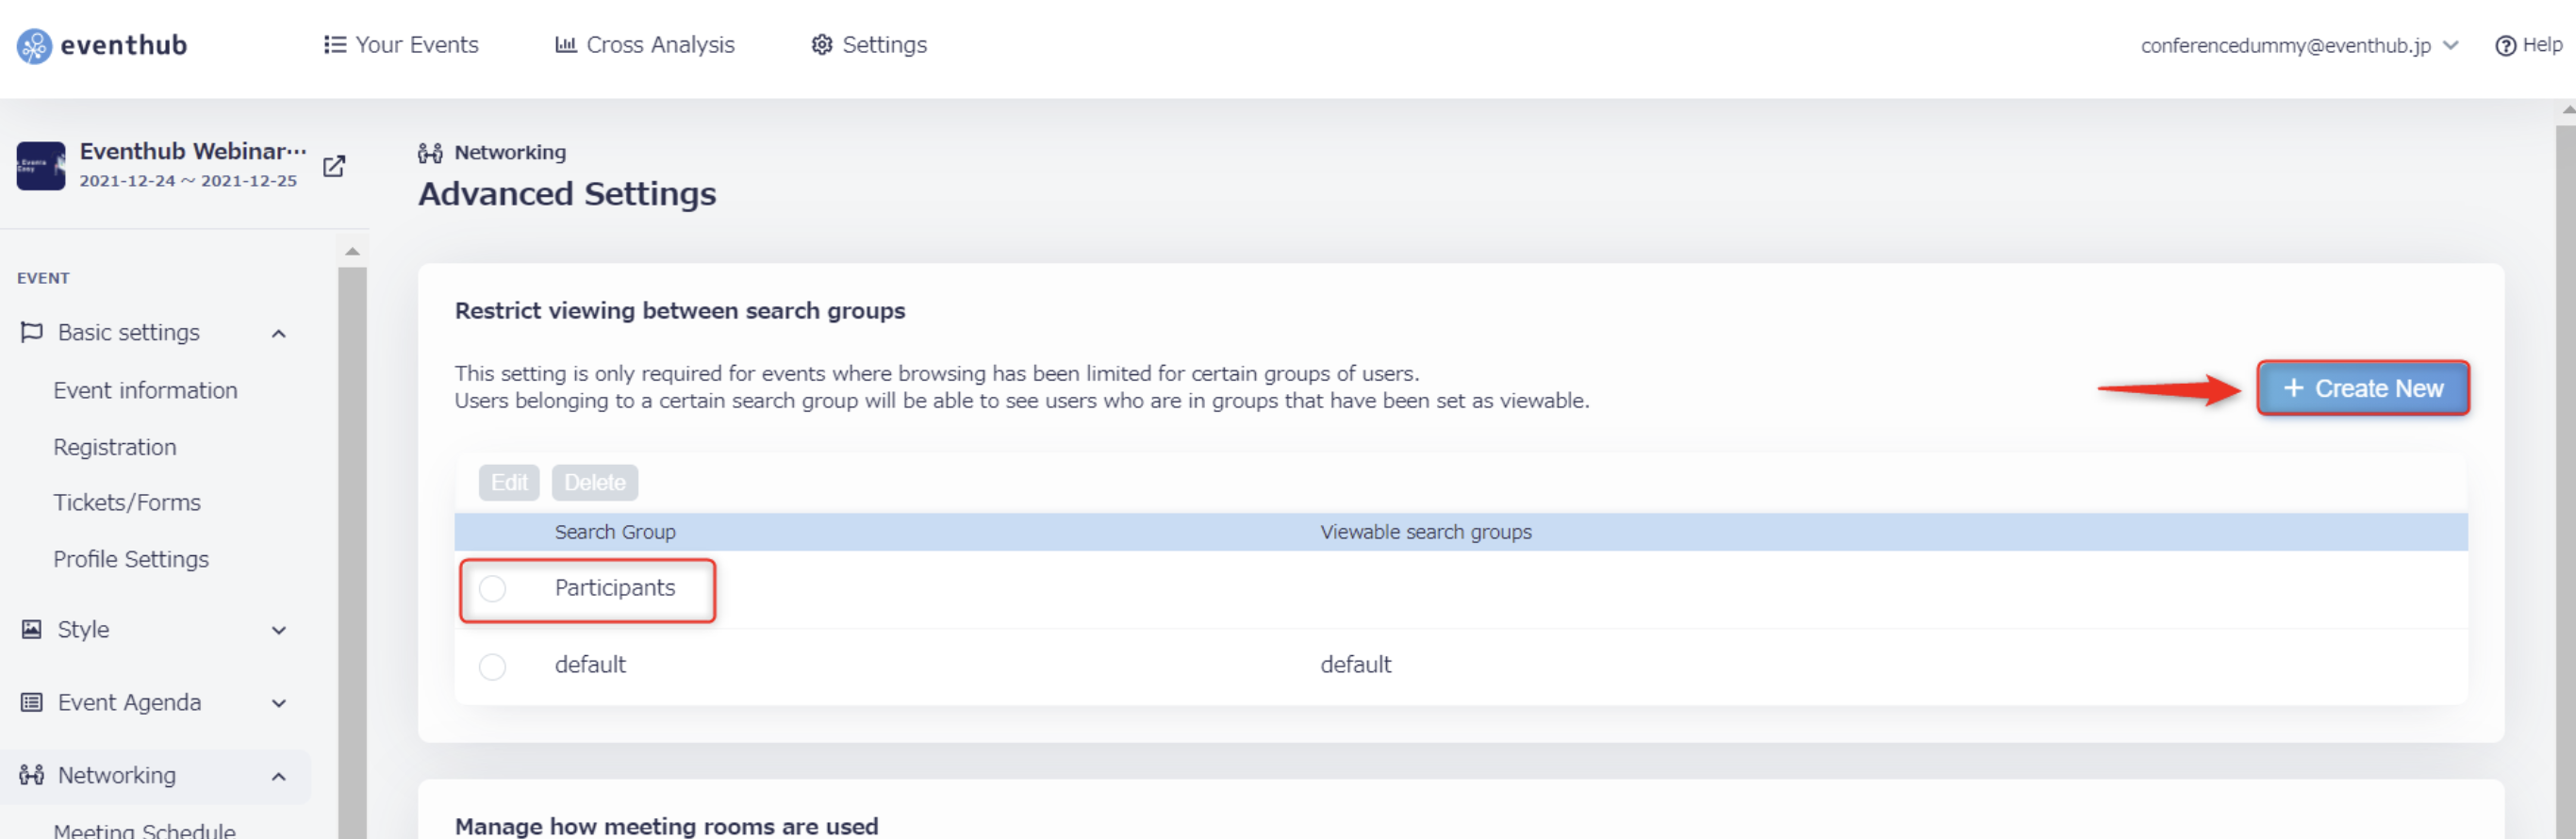
3. Check that the search group for 'Participants' has been added, and click 'Create New' again to add another group.
4. Create all of the search groups you will use. Next, you can configure the 'Permission Settings'.
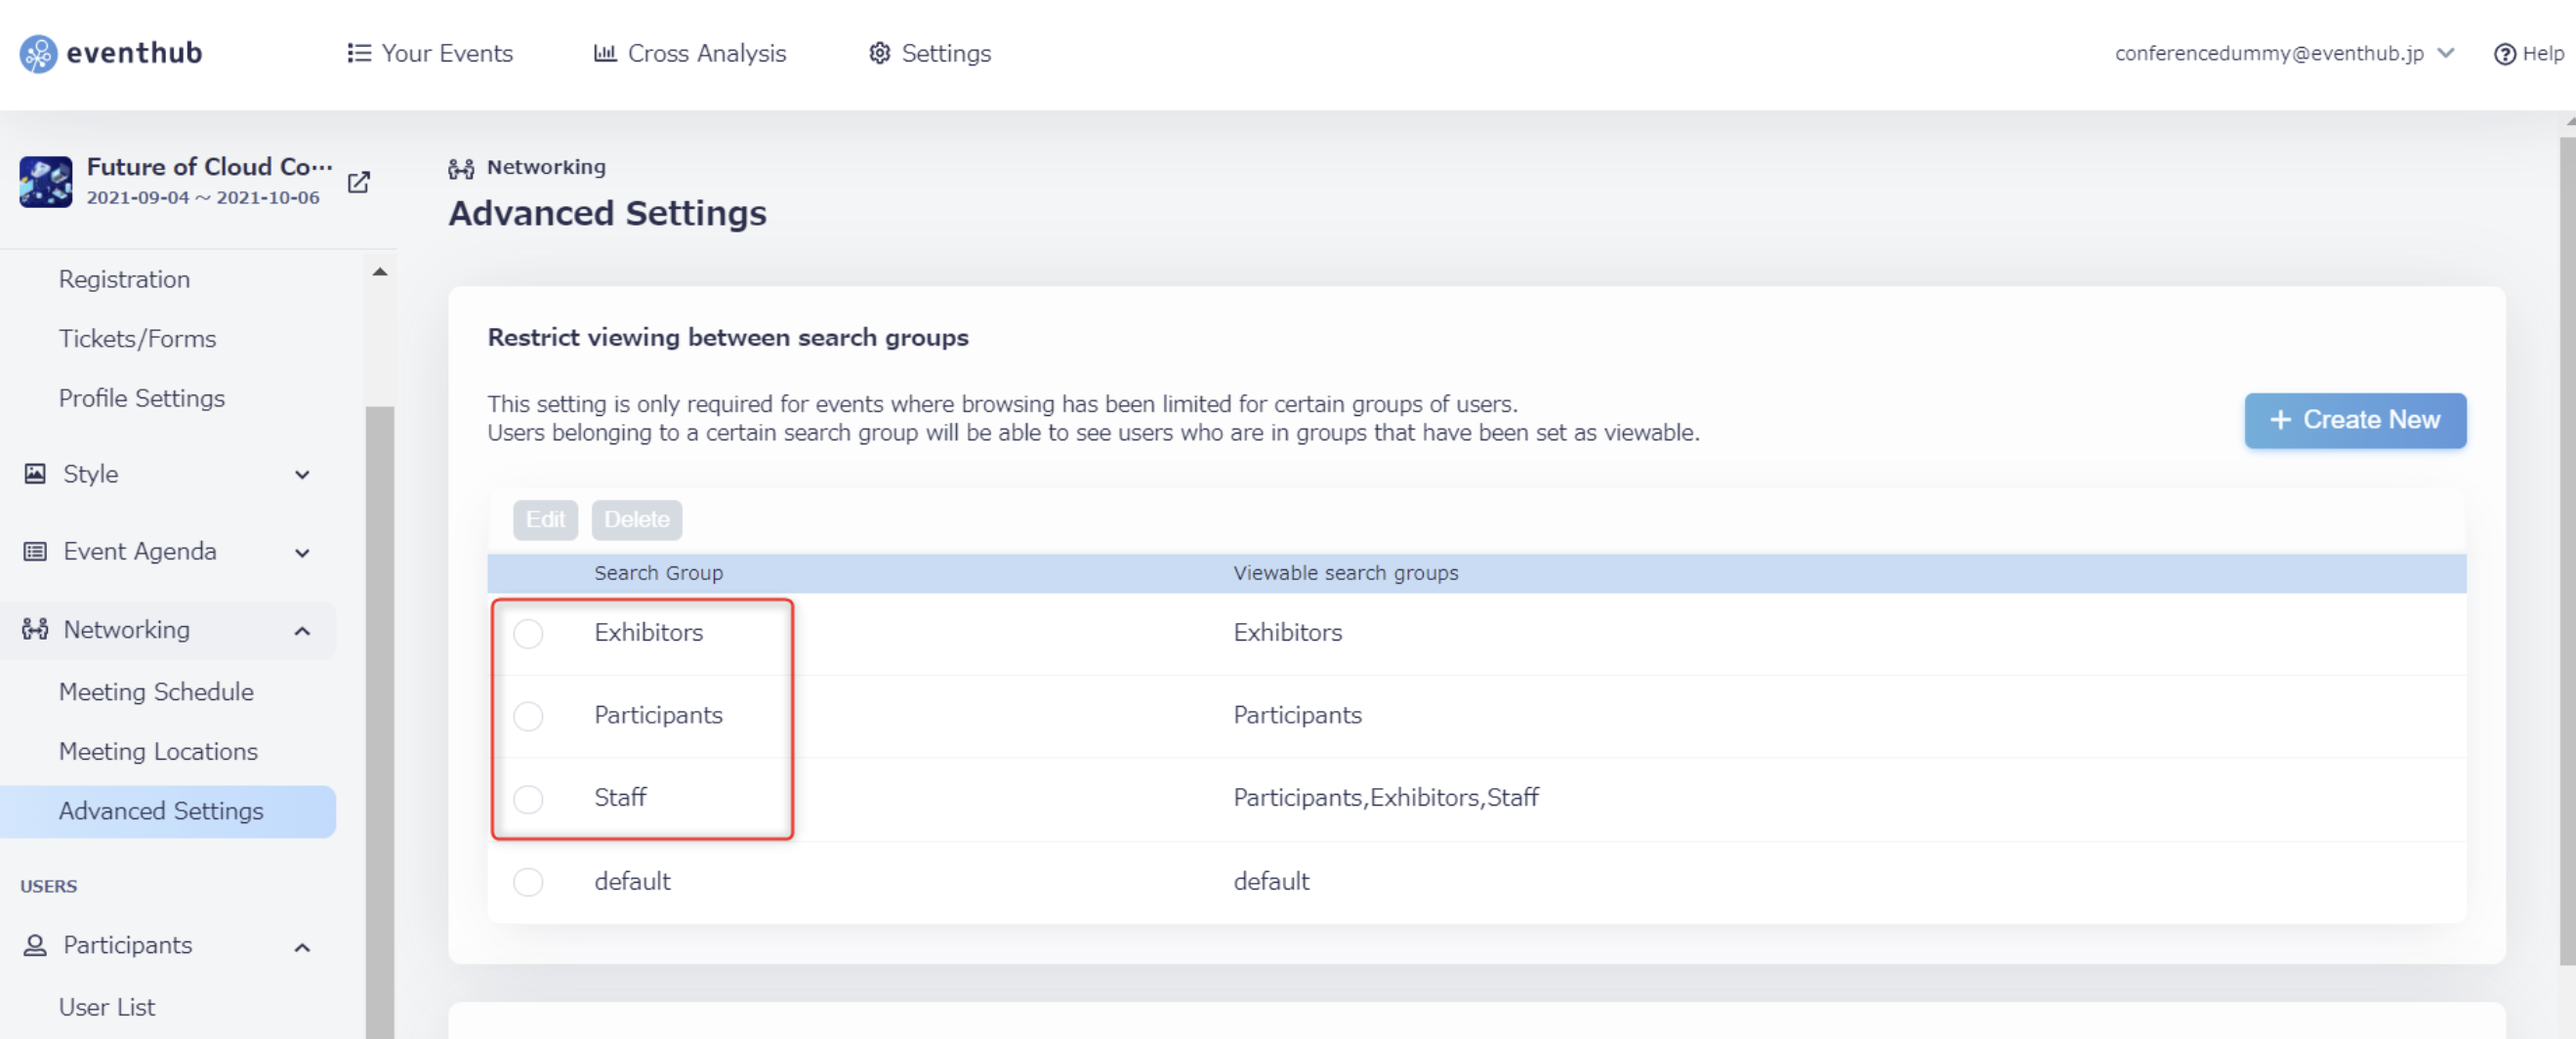
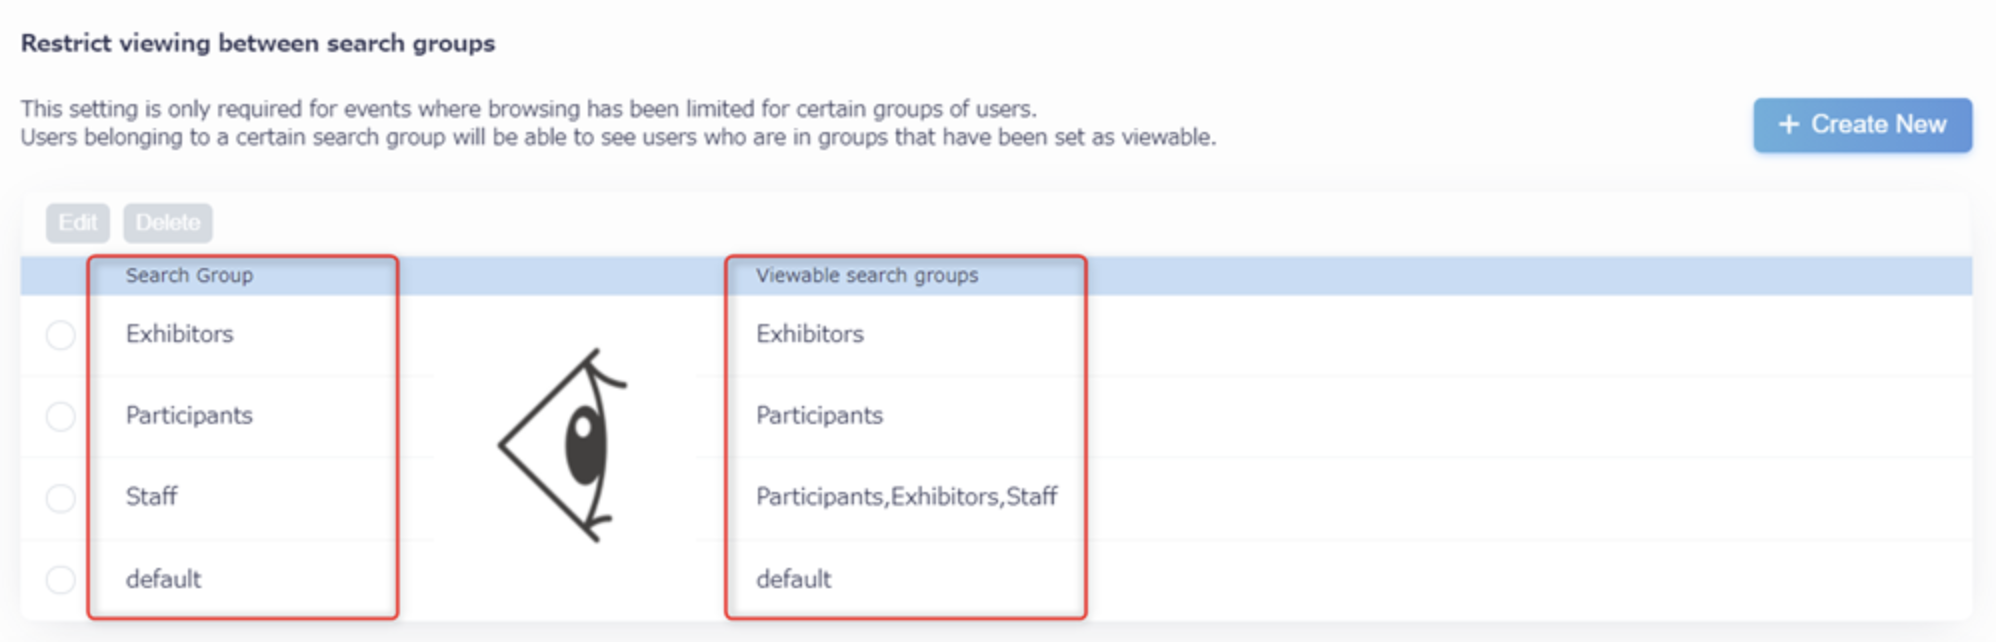
2. Set up the viewing permissions
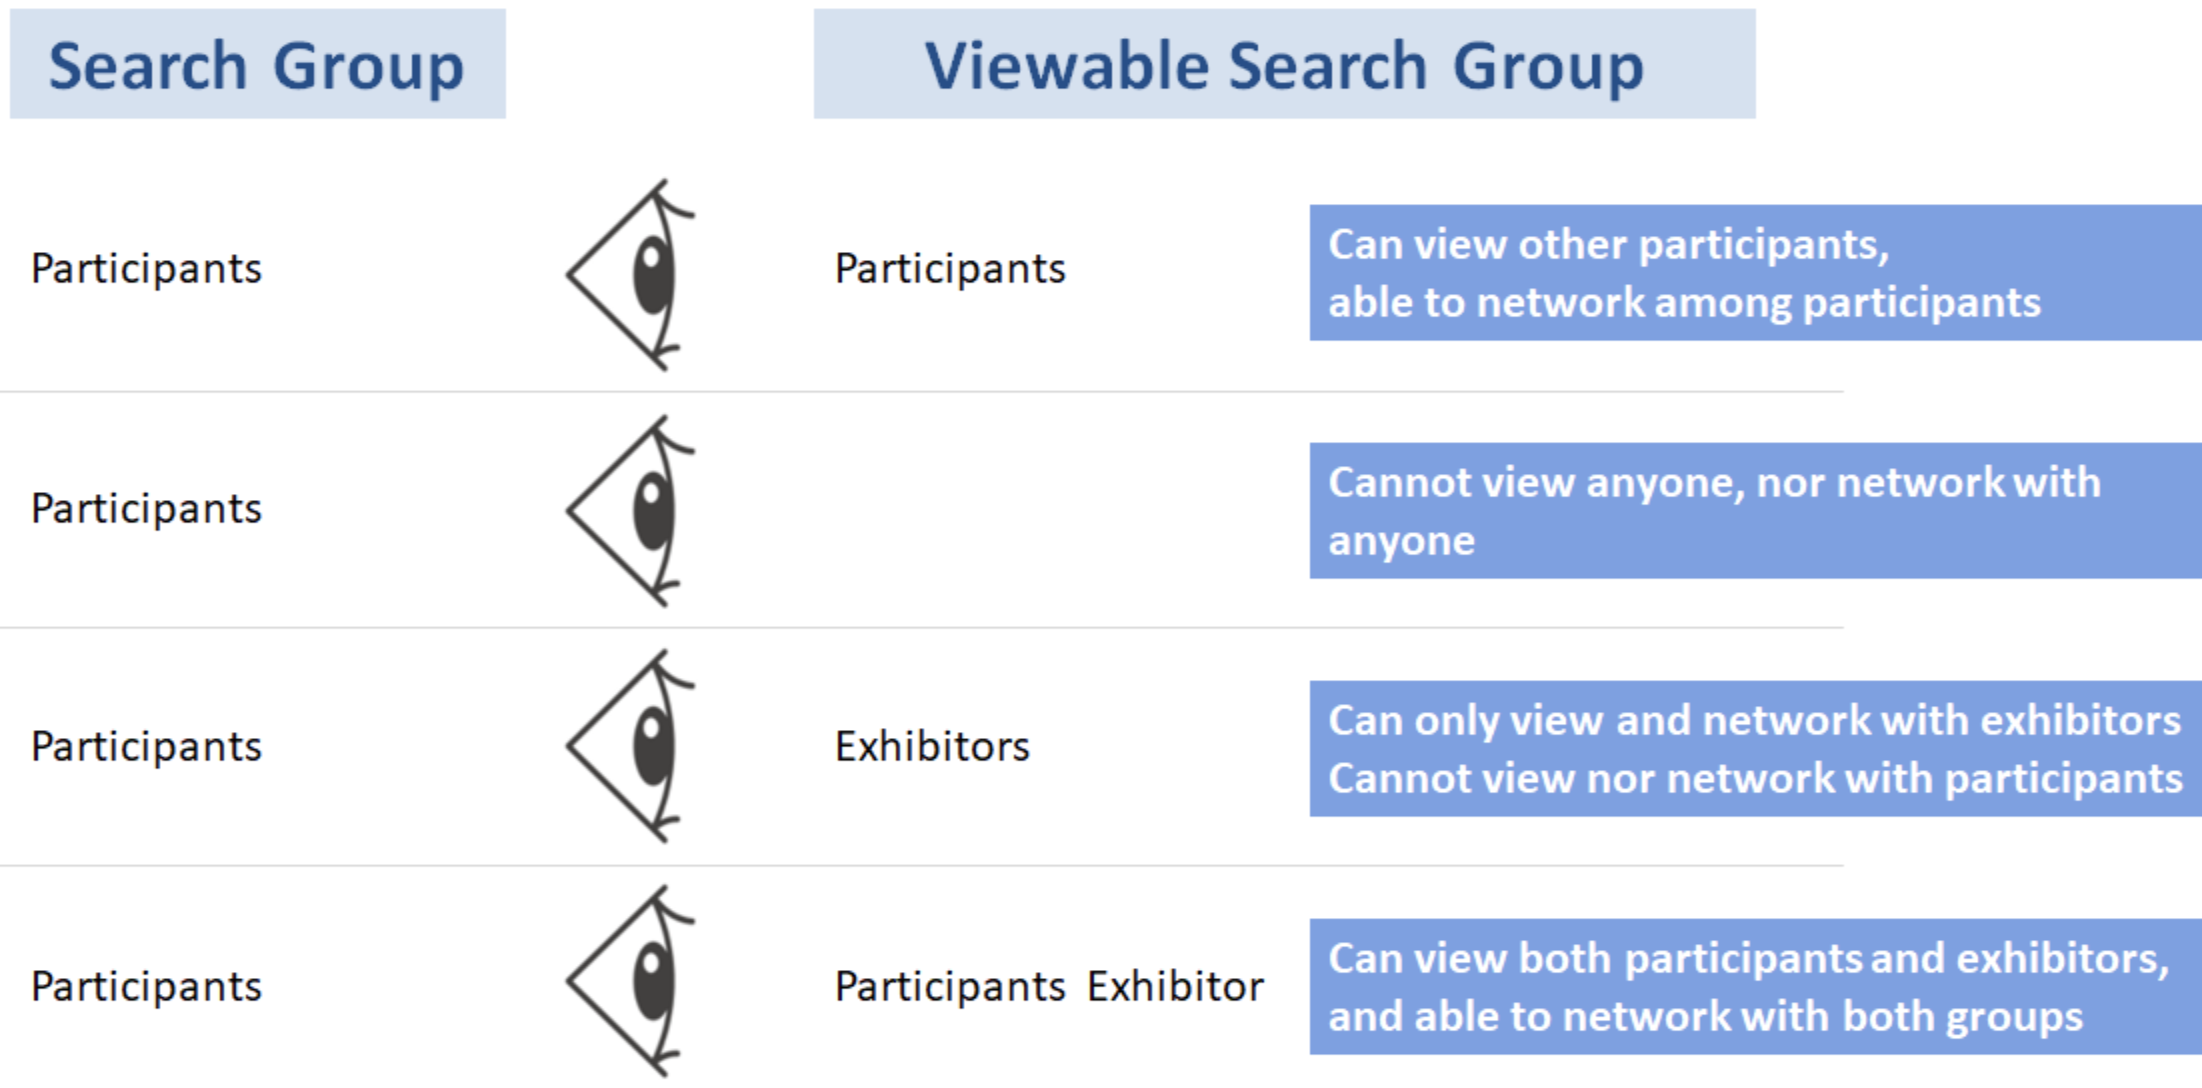
What are viewing permissions?
Through configuring 'Permission Settings', You can set which search groups are viewable to each other. If one search group is viewable to another, they will be able to network with each other, and the profiles of the people in that group will be displayed on the main event page.
1. Select the search group you wish to configure, and click 'Edit'.
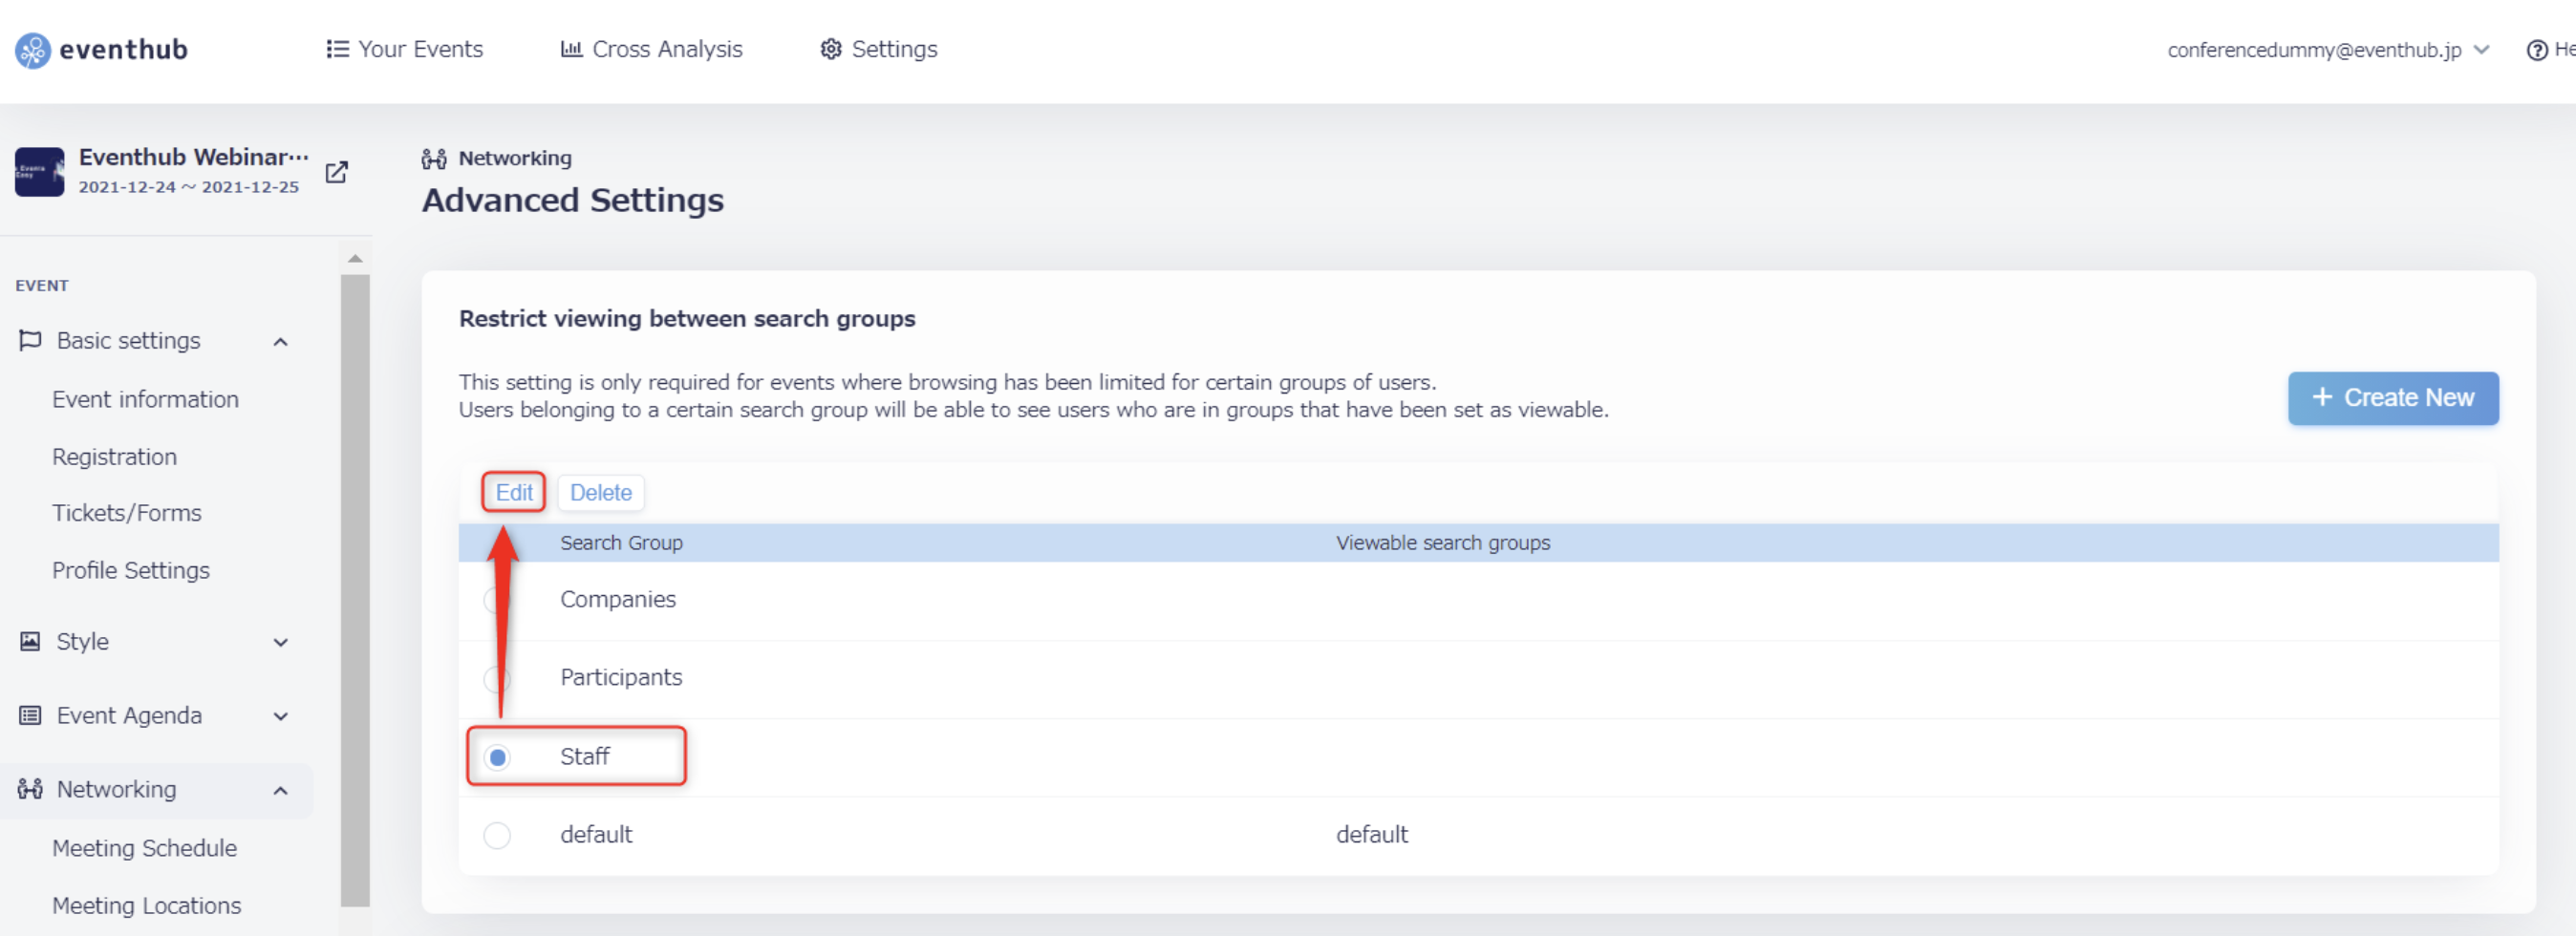
2. Choose the search group you wish to be viewable, and click 'Edit' again to save your settings. You may choose multiple groups. For example, in the below screenshot, the groups that are visible to the search group Staff are Staff themselves, Companies, and Participants.

3. Following the above steps, continue to choose the permission settings for all of your search groups.
Note that you cannot delete the default search group.
3. Assign participants to a search group
In this section, we will outline the two main ways to assign users to a search group.
1. Have participants sign up through a specific registration form to assign them to a search group.
Under 'Basic Settings', 'Tickets/Forms' click on 'Create New'. Then click on 'Advanced Settings' and choose which search group to assign for this registration form.
2. Assign search groups when uploading user information through Excel spreadsheets.
Go to 'Participants' or 'Exhibitors' > 'User List' > 'Create New' > 'Download template' to download the file for the Excel template.
Open the Excel file you have just downloaded and enter the required user information. In the field (searchgroup), please enter the name of the search group you wish to assign that user to.
<attention>If you will be utilizing search groups for your event, please log in yourself to double-check that all of your settings are working correctly (such as whether the search groups you have set are in fact visible to the right groups). </attention>
4. For events without networking
If you have 'Networking' set to 'Off', you do not need to limit visibility between users and you don't need to make use of search groups. You can leave the default settings as they are.