You can send emails to registered EventHub users at any time. Send emails to invited users who haven't logged in yet to make sure that they log into their account, or send reminder emails before your event date approaches to maximize attendance.
When to utilize emails:
・User was invited but hasn't logged in yet
・User has logged in but usage is low
・To remind users of an upcoming event
Contents
1. Create a new email
Create a new email in 4 easy steps:
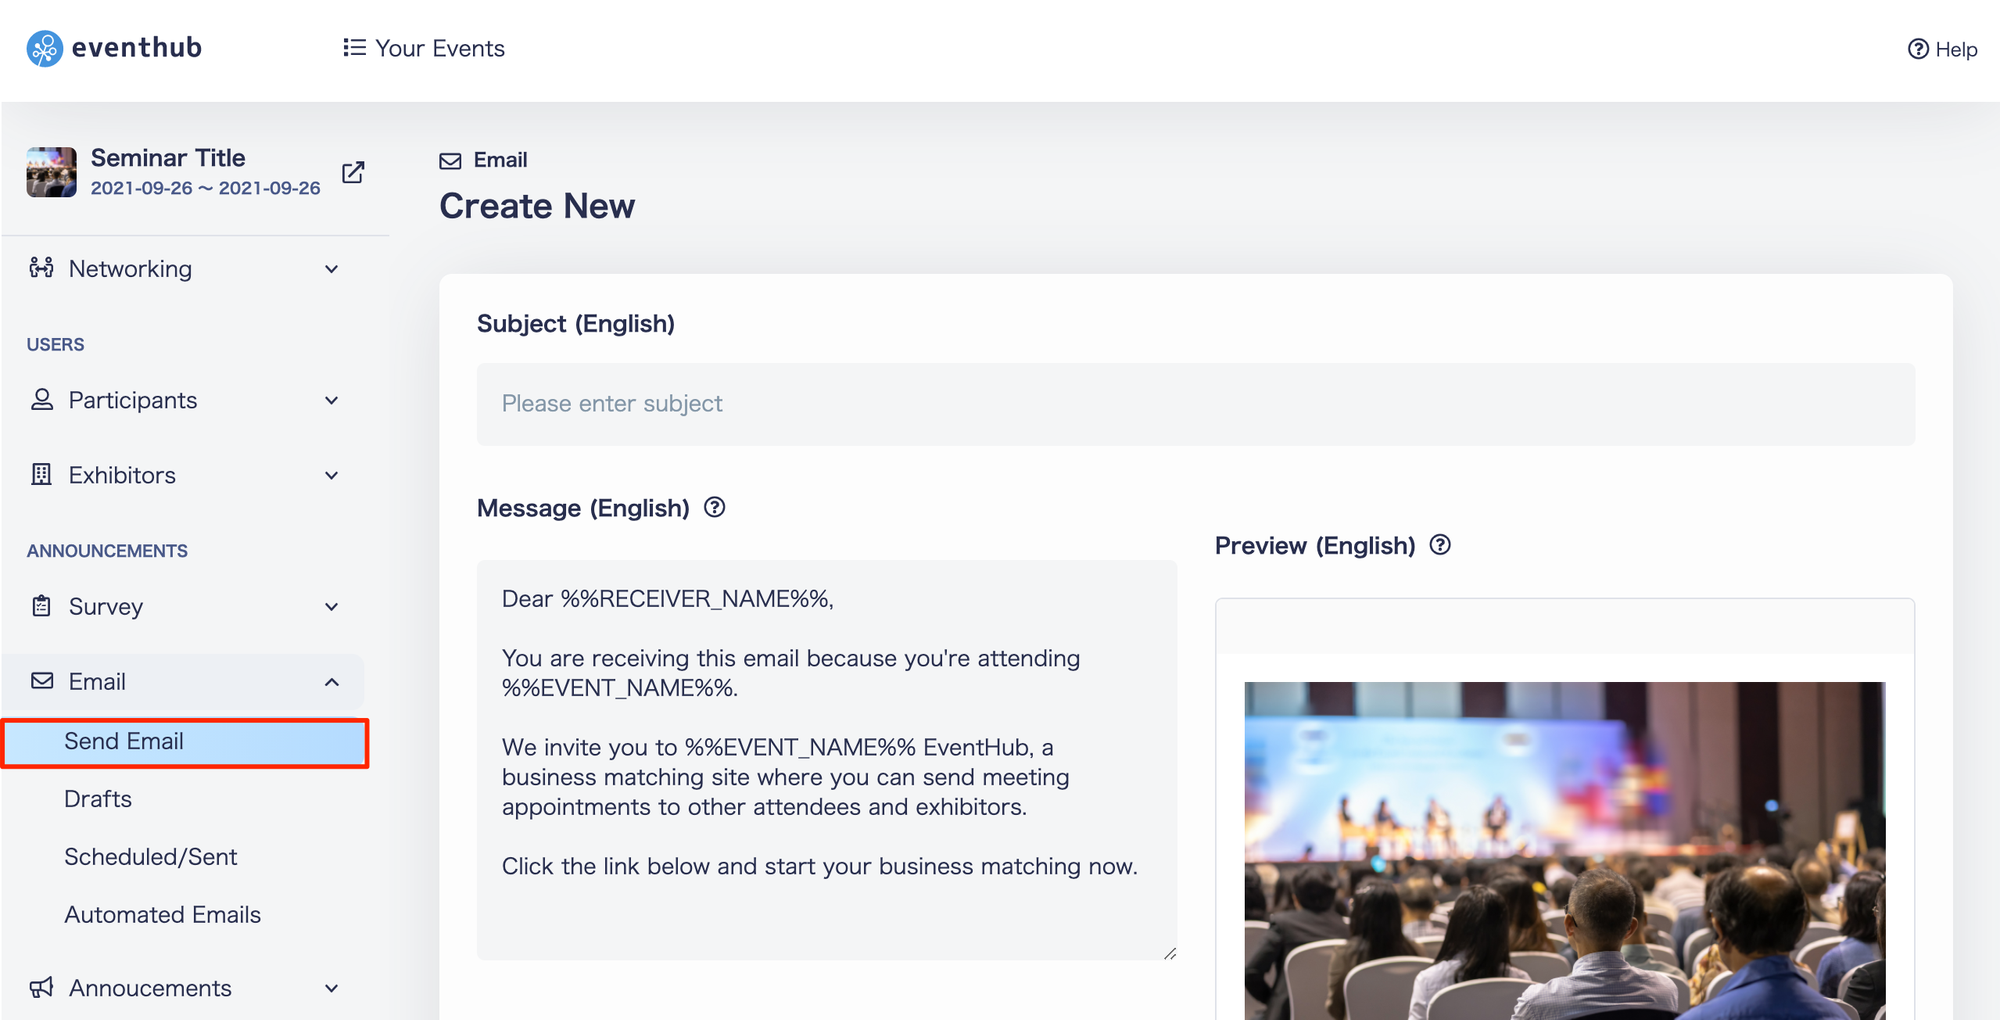
1. Select 'Send Email' from your admin page
2. Edit the subject and message content for your email
3. Select who to send to & Email Settings

<tips>You can test emails first by using the custom email feature to send to your own address.</tips>
| Send to | Details |
| All | All users registered with Eventhub |
| Attendees only | Users displayed on the participants user list |
| Exhibitors only | Users displayed on the exhibitors user list |
| Attendees with "Matching" set to ON | Users displayed with "Matching" ON from the user list |
| Attendees with "Matching" set to OFF | Users displayed with "Matching" OFF from the user list |
| Users who have unread requests | Users who have received invitations but have not opened their messages page. |
| Users who have not signed in | Users who have been sent invitations but have not logged in |
| Custom | Select custom email addresses to send to |
| Edit email settings | Details |
| Save as Draft |
By selecting this setting, your email will be saved under 'Email' > 'Drafts'. The below memo is for internal notes and will not be displayed when sending out emails. |
| Send Now |
Your email will be sent immediately. You can review sent emails from 'Email' > 'Scheduled/Sent'. |
| Send Later |
You can schedule an email to be sent at a certain time or date. You can review your scheduled emails from 'Email' > 'Scheduled/Sent'. You can also edit/delete your scheduled emails anytime before the send date. |
<tips>We recommend scheduling reminder emails in advance. You can set up several reminder emails at different time marks, such as 3 days prior to the event and the day preceding the event.</tips>
2. Learn more about variables ( %%EVENT_NAME%% )
By using variables, you can set certain content to be automatically filled when sending an email.
| Variable Name | Detaills | Availlable for |
| %%EVENT_NAME%% | Event name | New emails & Automated emails |
| %%RECEIVER_NAME%% | Name of the receiver | New emails & Automated emails |
| %%RECEIVER_AFFILIATION%% | Organization of the receiver | New emails & Automated emails |
| %%RECEIVER_POSITION%% | Job position of the receiver | New emails & Automated emails |
| %%LOGIN_LINK%% | Login Link | New emails & Automated emails |
| %%TARGET_BUTTON%% | Button | Automated emails only |
| %%PASSWORD_SETUP_LINK%% | Link for password setup | Automated emails only |
The destination of "%%LOGIN_LINK%%" differs depending on the the status of the user. Users who have already set their password and previously signed in will be linked to either a login page or the top page. For users who have received an invitation but have not set up their password or previously signed it, they will be send to a password setup page. You can send emails with "%%LOGIN_LINK%%" to users who cannot find their invitation emails so they can complete their sign in process.
<attention>Please note that "%%TARGET_BUTTON%%" and "%%PASSWORD_SETUP_LINK%%" can only be used in automated emails, and therefore cannot be used in reminder emails.</attention>
3. Change font style and color
Emails are sent in HTML or text formats. Please note that since HTML emails are automatically converted, some A tags may be visible in text emails.
You can use HTML code to edit text style and color.
- Change text color(Example: Red text)
<span style="color: red">Insert text</span>
- Change text to bold
<span style="font-weight: bold">Insert text</span>
Please note: Since the above is not a service provided by EventHub, we cannot guarantee the HTML code will operate as planned.
4. Email send address
You can change sender names but the send address (no-reply@eventhub.jp) cannot be edited. However, if participants reply to your email, the email will be sent to your registered email address.
To learn more about sender names and registered email address, take a look at Edit Automated Emails.
<attention>Please note that you cannot send emails from your own domain.</attention>
5. Unsubscribing from emails
There are 2 methods to unsubscribe from emails. For either method, the settings cannot be changed from the admin page and must instead be done by the participant themselves.
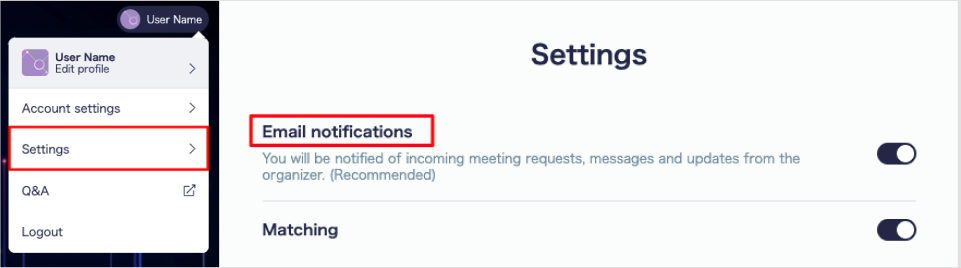
Method 1: Unsubscribe from settings
1. Click your name from the upper-right corner of the event page.
2. Select Settings > Email notifications
Method 2: Unsubscribe from emails
1. Scroll to the bottom of the email you've received
2. Click on the unsubscribe link
An unsubscribe confirmation email will not be sent to the user for either of the methods mentioned above.Please note that users may continue to receive some emails even after they have unsubscribed.