If Networking Mode has been enabled, participants will be able to see each other's calendars and send each other meeting requests. The event organizer can freely set the timeframe for participants to schedule meetings.
Note that this feature is not used for events that have Networking mode set to 'Off', or for events where only messaging is enabled.
1. Create a meeting timetable
Set up a meeting schedule that aligns with the timing and goals of your event. For example, if the event has a heavy focus on sales consultations, you may want to set 30 minute meeting slots. On the other hand, for events that encourage more casual meetings, the slots could be set to 10 minutes each. The schedule set is the same across the board, you may not set different timings for individual meetings.
For example, depending on the meeting type, you could set your schedule as below:
- Casual online introductions: 10 minute meeting slots, 5 minute break.
- Sales consultations: 25 minute meeting slots, 5 minute break.
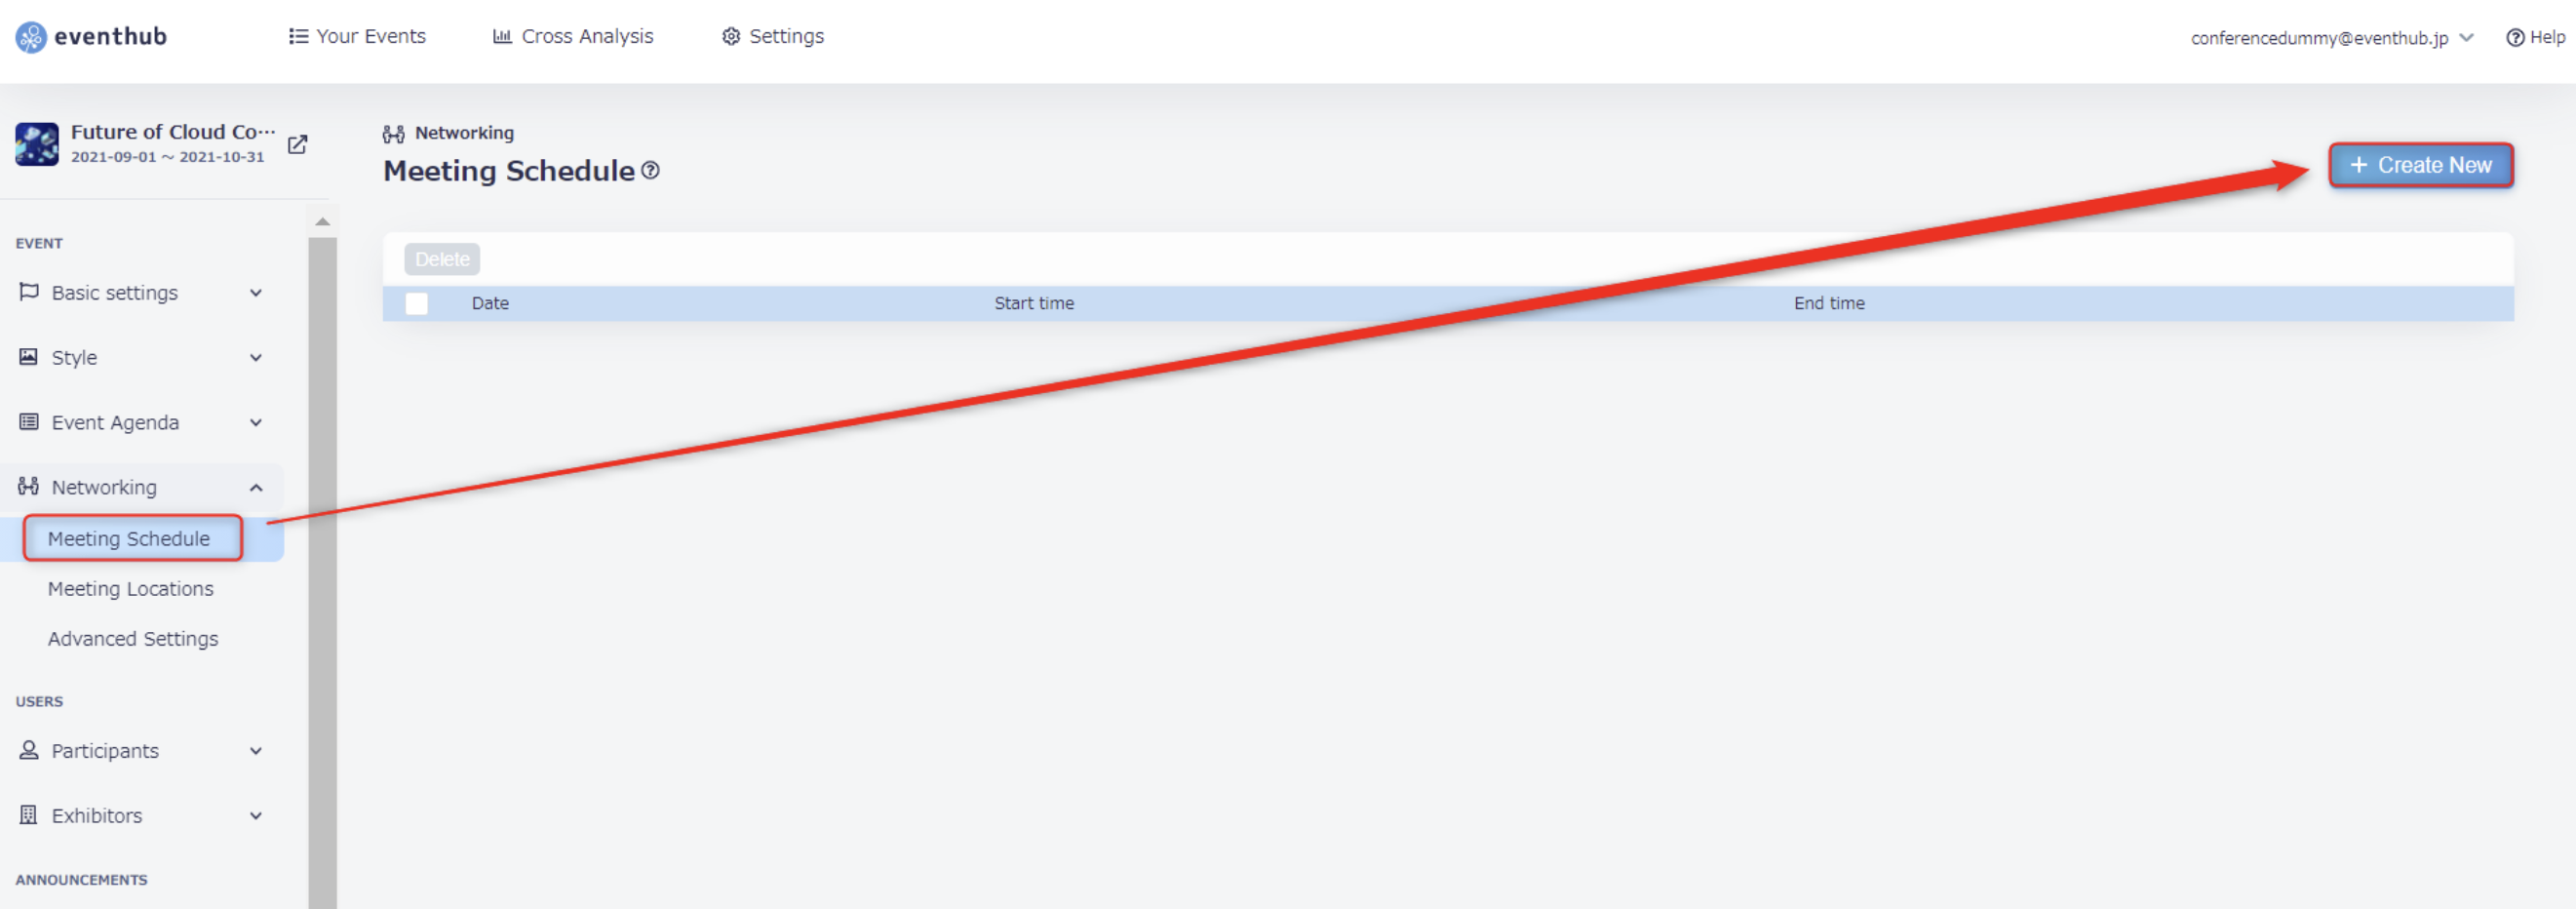
1. Under 'Networking' > 'Meeting Schedule', click on 'Create New'.
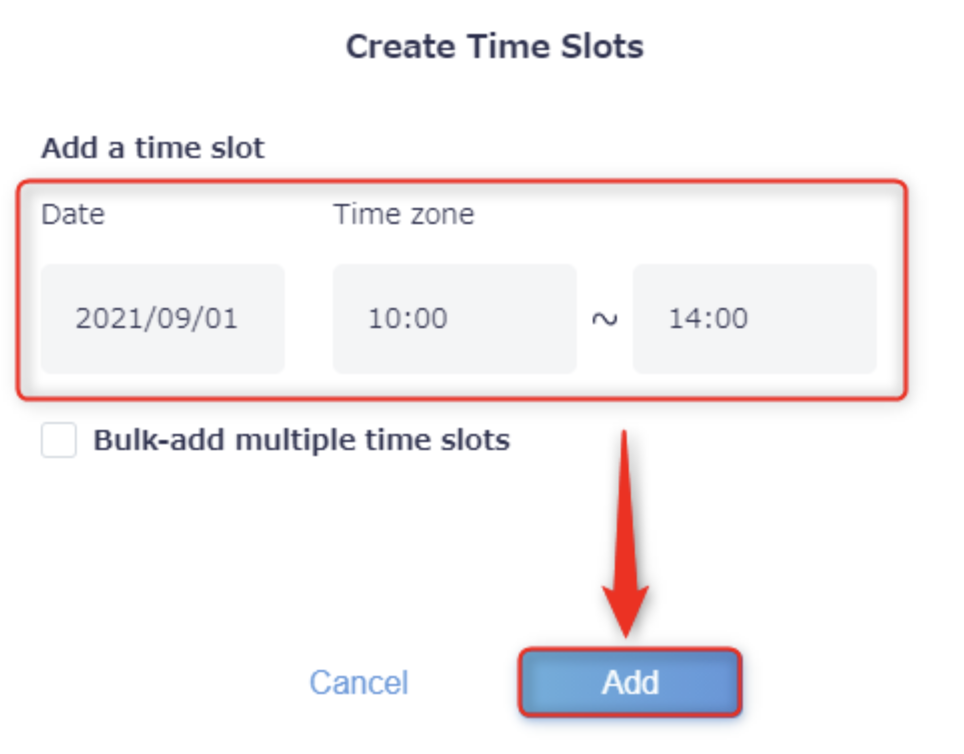
2. Enter the date and time window, and click 'Add' to save your settings.
Under 'Time zone', you can either choose the timings from the pull-down menu, or you can enter the time manually by clicking on the box and typing it in.
The time can be set to the minute (eg. 10:00~10:01).
3. Use the bulk adding feature if you would like to schedule separate meeting slots during the time window you have chosen. For example, if you would like to create individual 25 minute meeting slots with a 5 minute break in between, click 'Bulk-add multiple time slots' and enter the time for the meeting slot and buffer.
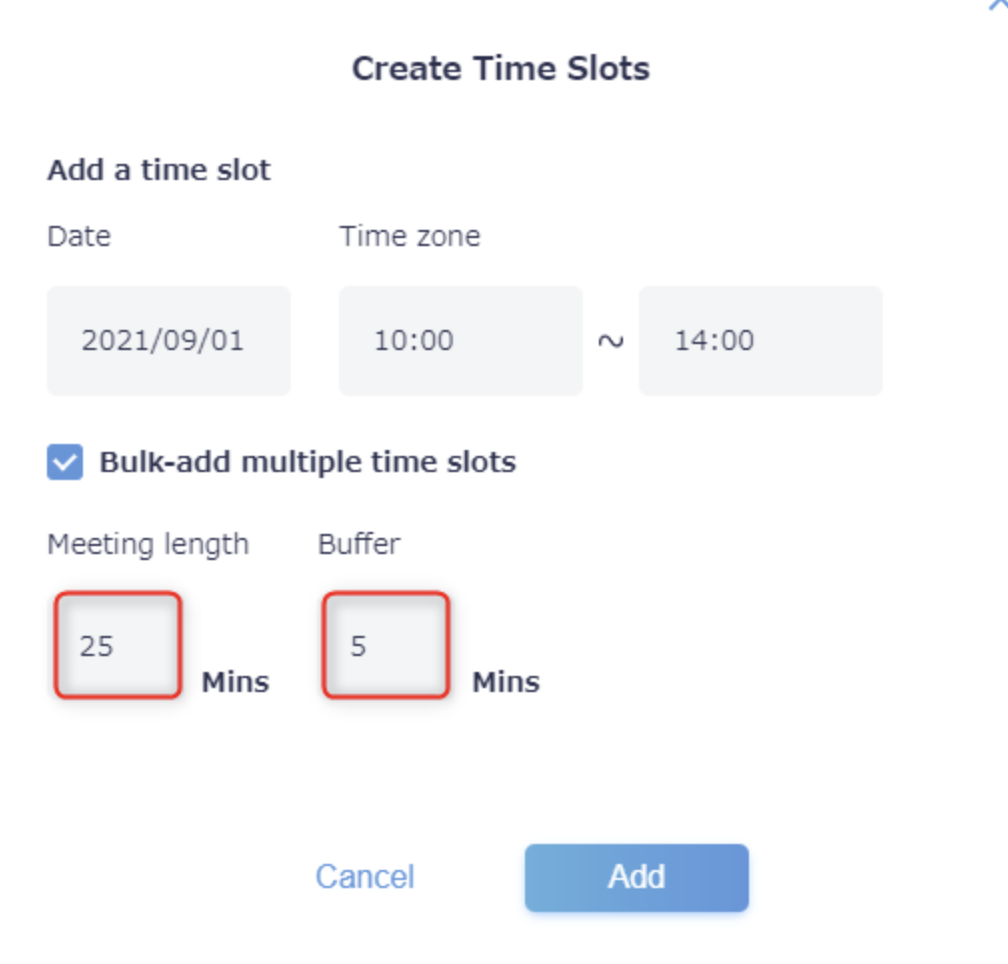
▼ 25 minute meeting slots with a 5 minute break in between for 10:00-14:00 on September 1st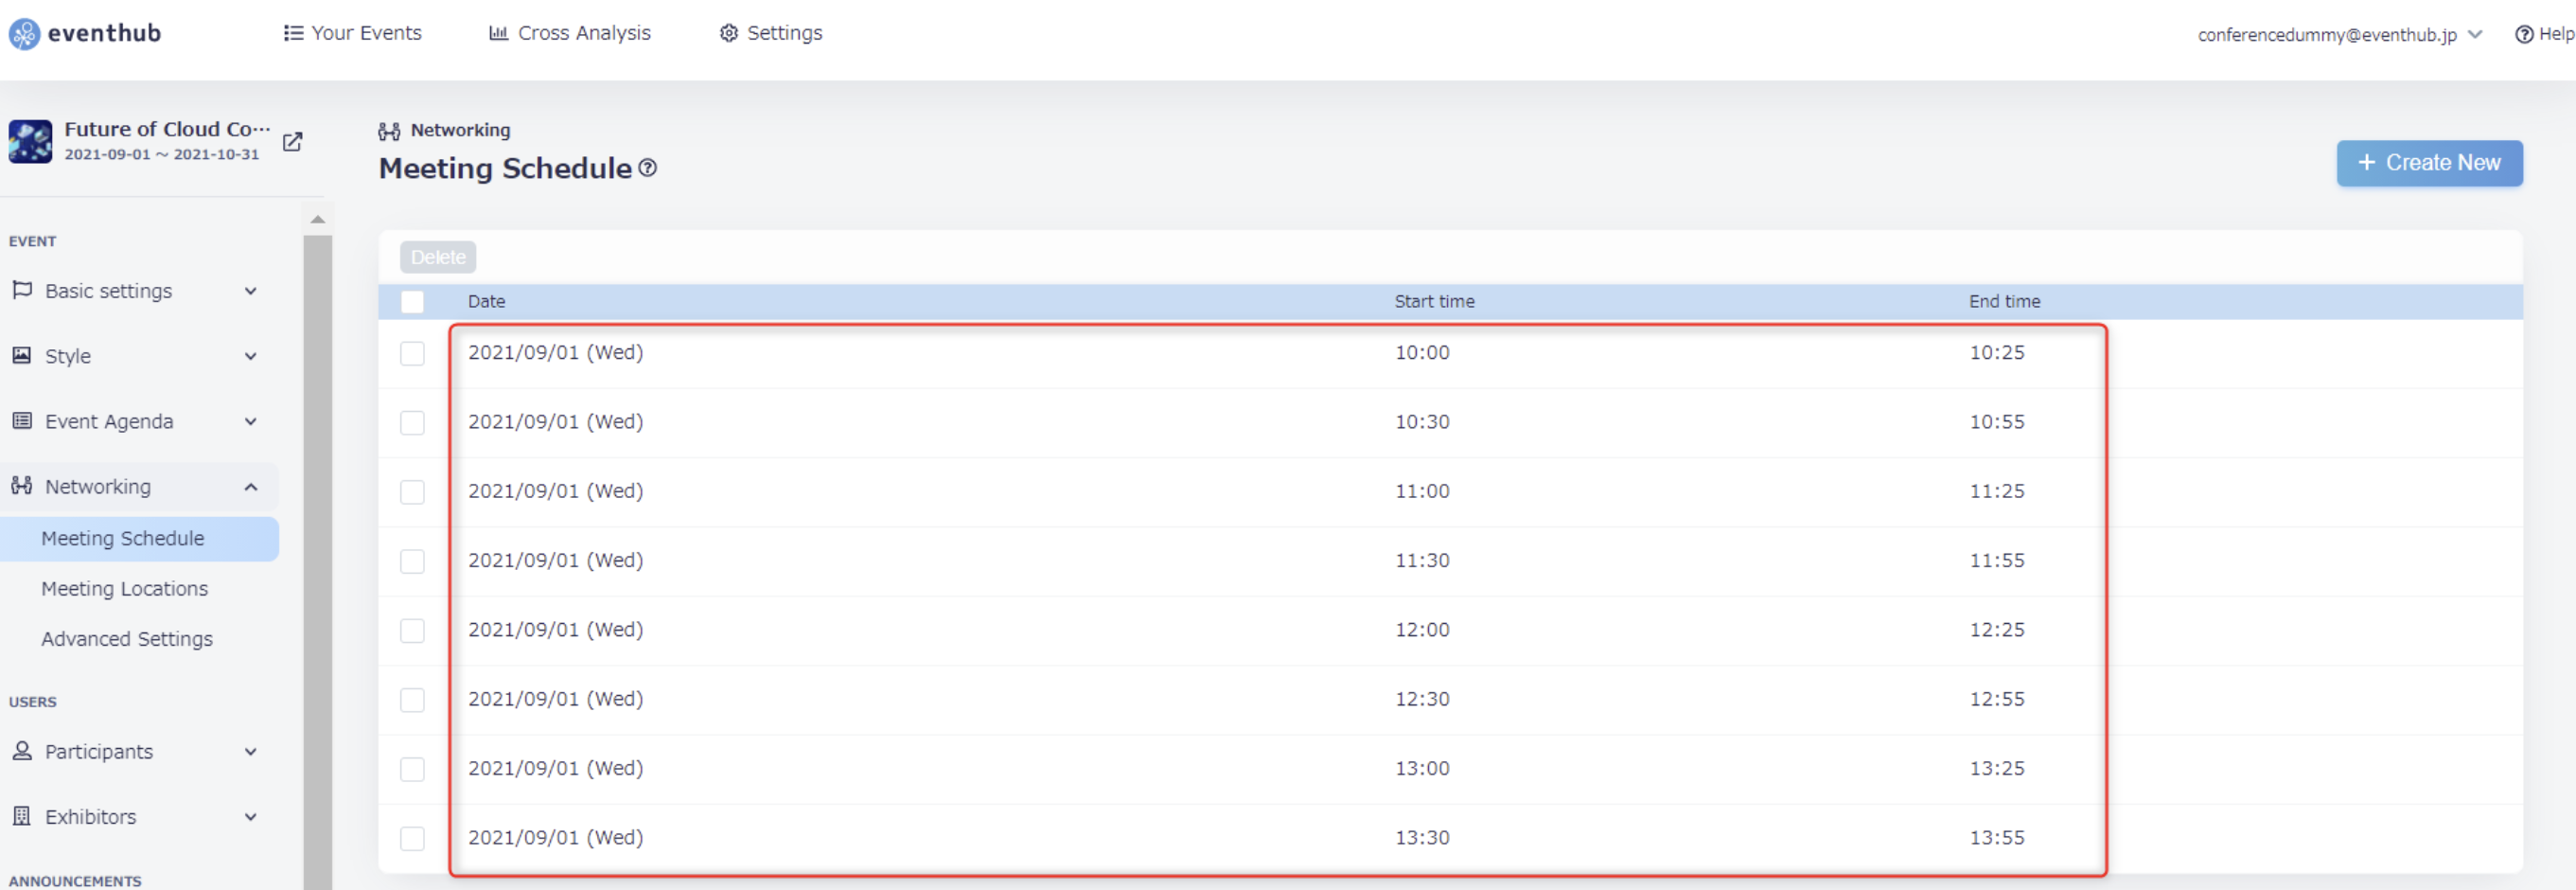
<tips>It is not possible to set times across multiple days, so please enter 23:59 if you want to allow meetings to be scheduled until midnight of that day.</tips>
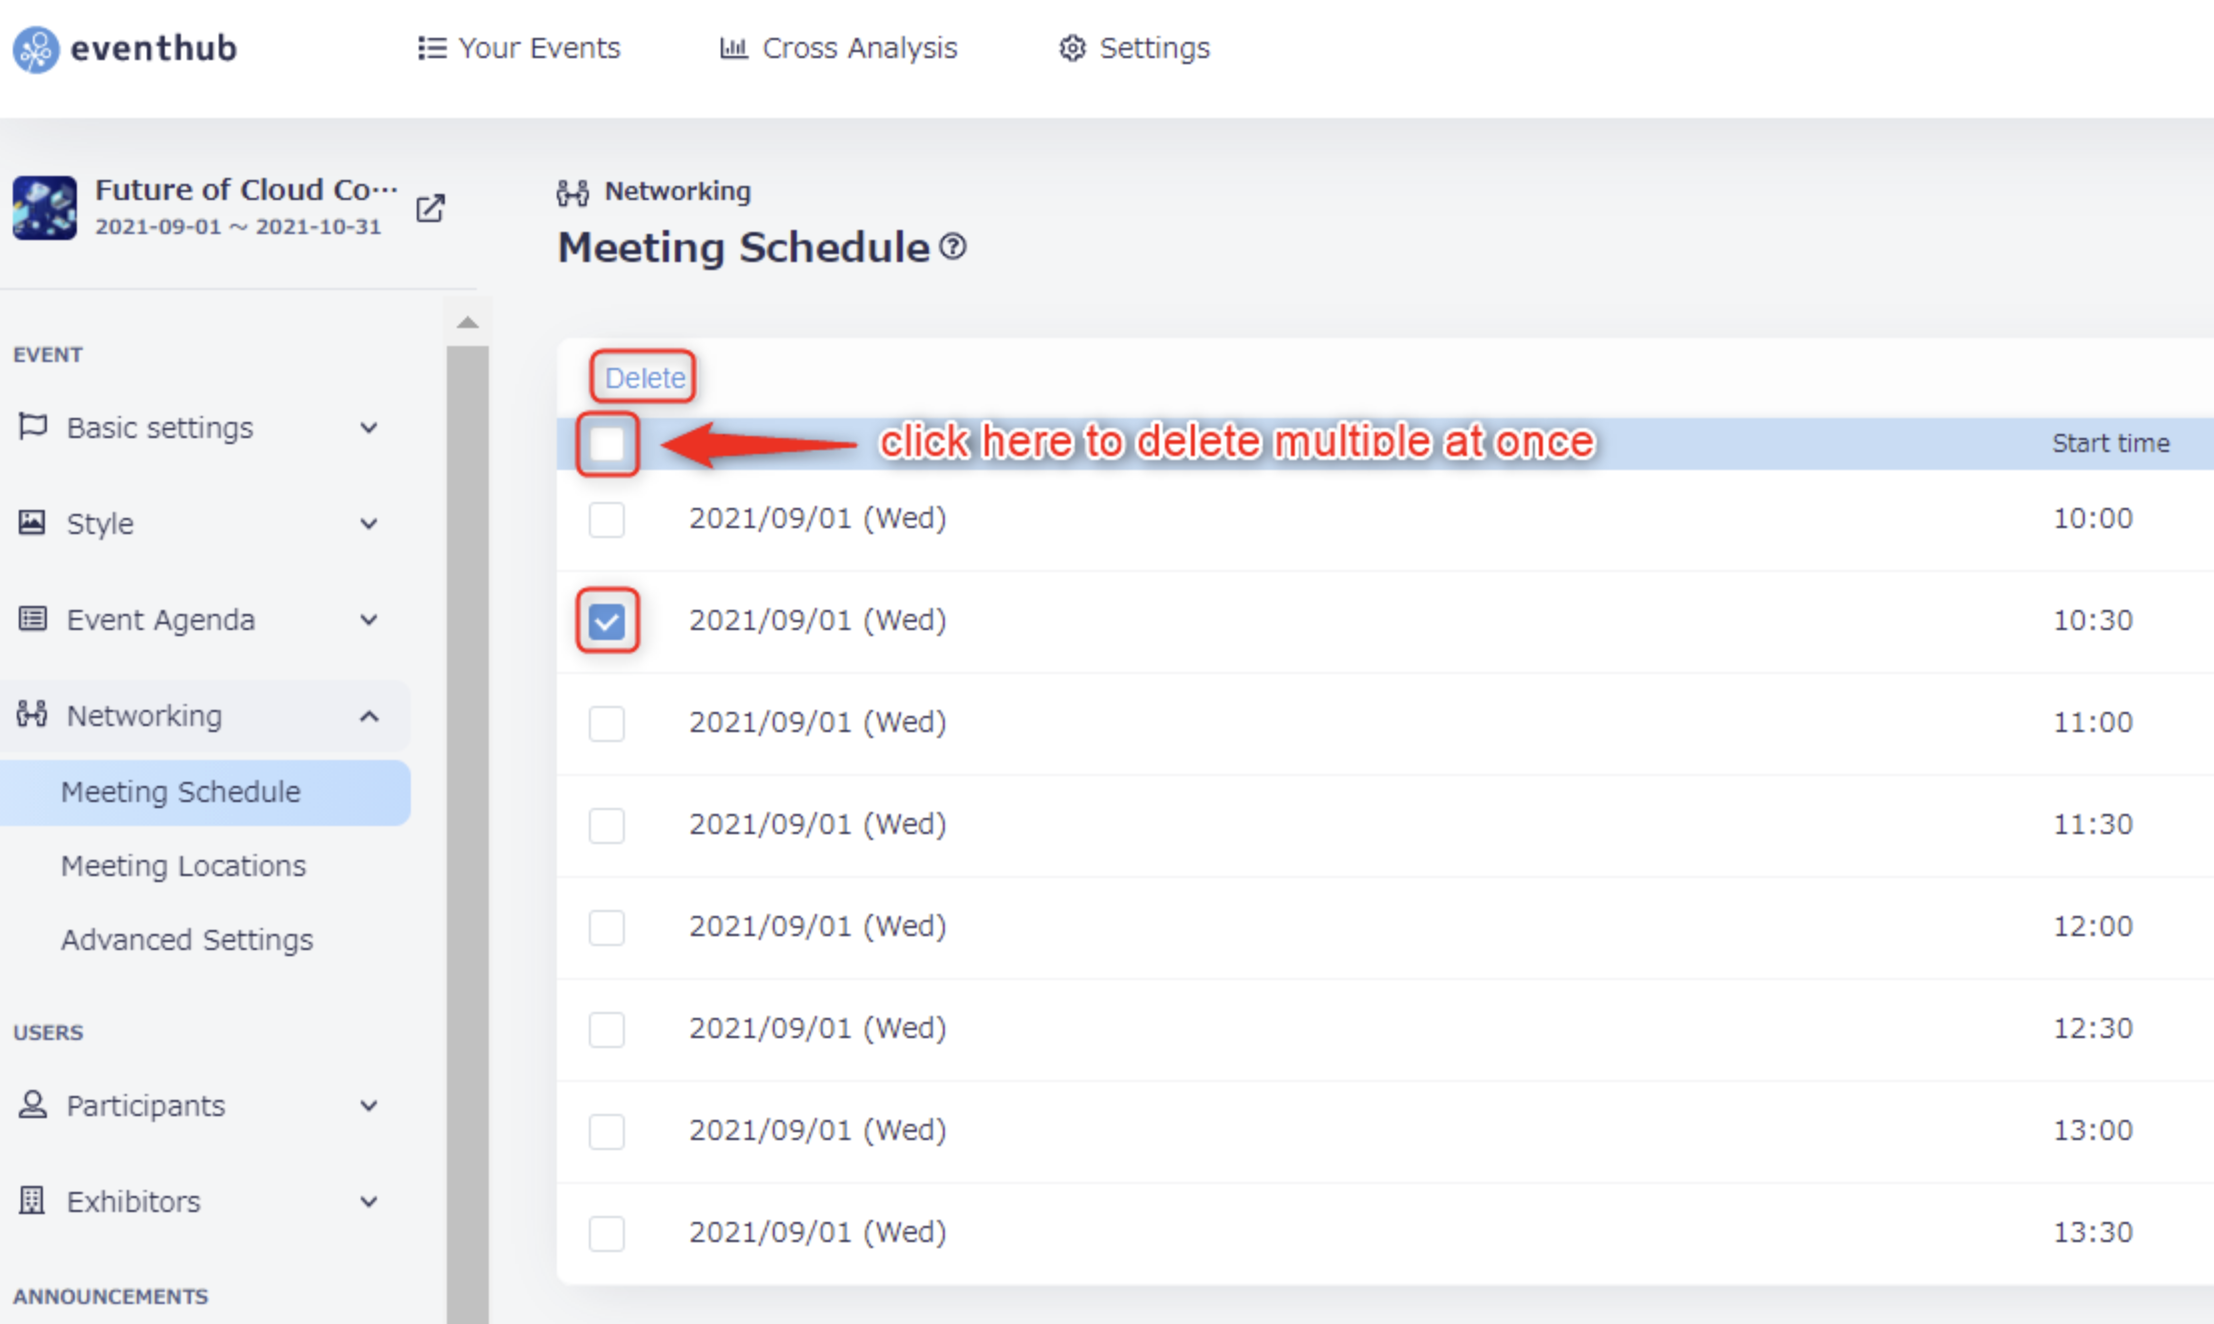
2. Deleting your meeting timetable/slots
If you wish to delete a time window or individual time slot, please select the slot in question by clicking on the checkbox next to it and clicking 'Delete'.
However, if a meeting request has already been sent, note that some slots cannot be deleted. If you still wish to delete the slot, please refer the following steps to see what your options are.
If a meeting request is pending/accepted
If a meeting request has already been sent and has either been accepted or is still pending, the time slots cannot be deleted by the organizer. The participants in question will need to delete the request themselves.
If a meeting request has been sent and declined
If a participant has sent a meeting request which has been declined for the time slots you wish to delete, you will need to have the users in question go through the following steps to delete the time slot.
-
Ask the participant to send the meeting request again during the same time slot.
★ If Mr. A sent a meeting request, and Ms. B declined it, please ask Mr. A to send the same request again.
-
Then ask the request sender to delete the request (in the above example, you would ask Mr. A to delete the request).
<attention>The above methods can take time and effort, so please try to ensure there are no errors when setting up your meeting schedule.</attention>