Embed the generated tag from the tickets/forms you create in EventHub on other websites to create a link to the event registration form.
User information will also be collected at the time of registration, and an invite email will also be sent.
*Please note that this feature cannot be used for paid tickets.
Contents
1. Getting started
From 'Basic Settings' > 'Profile Settings' please set the information you would like to be displayed in the registration form. For more information on how to do this, please see Profile Settings.
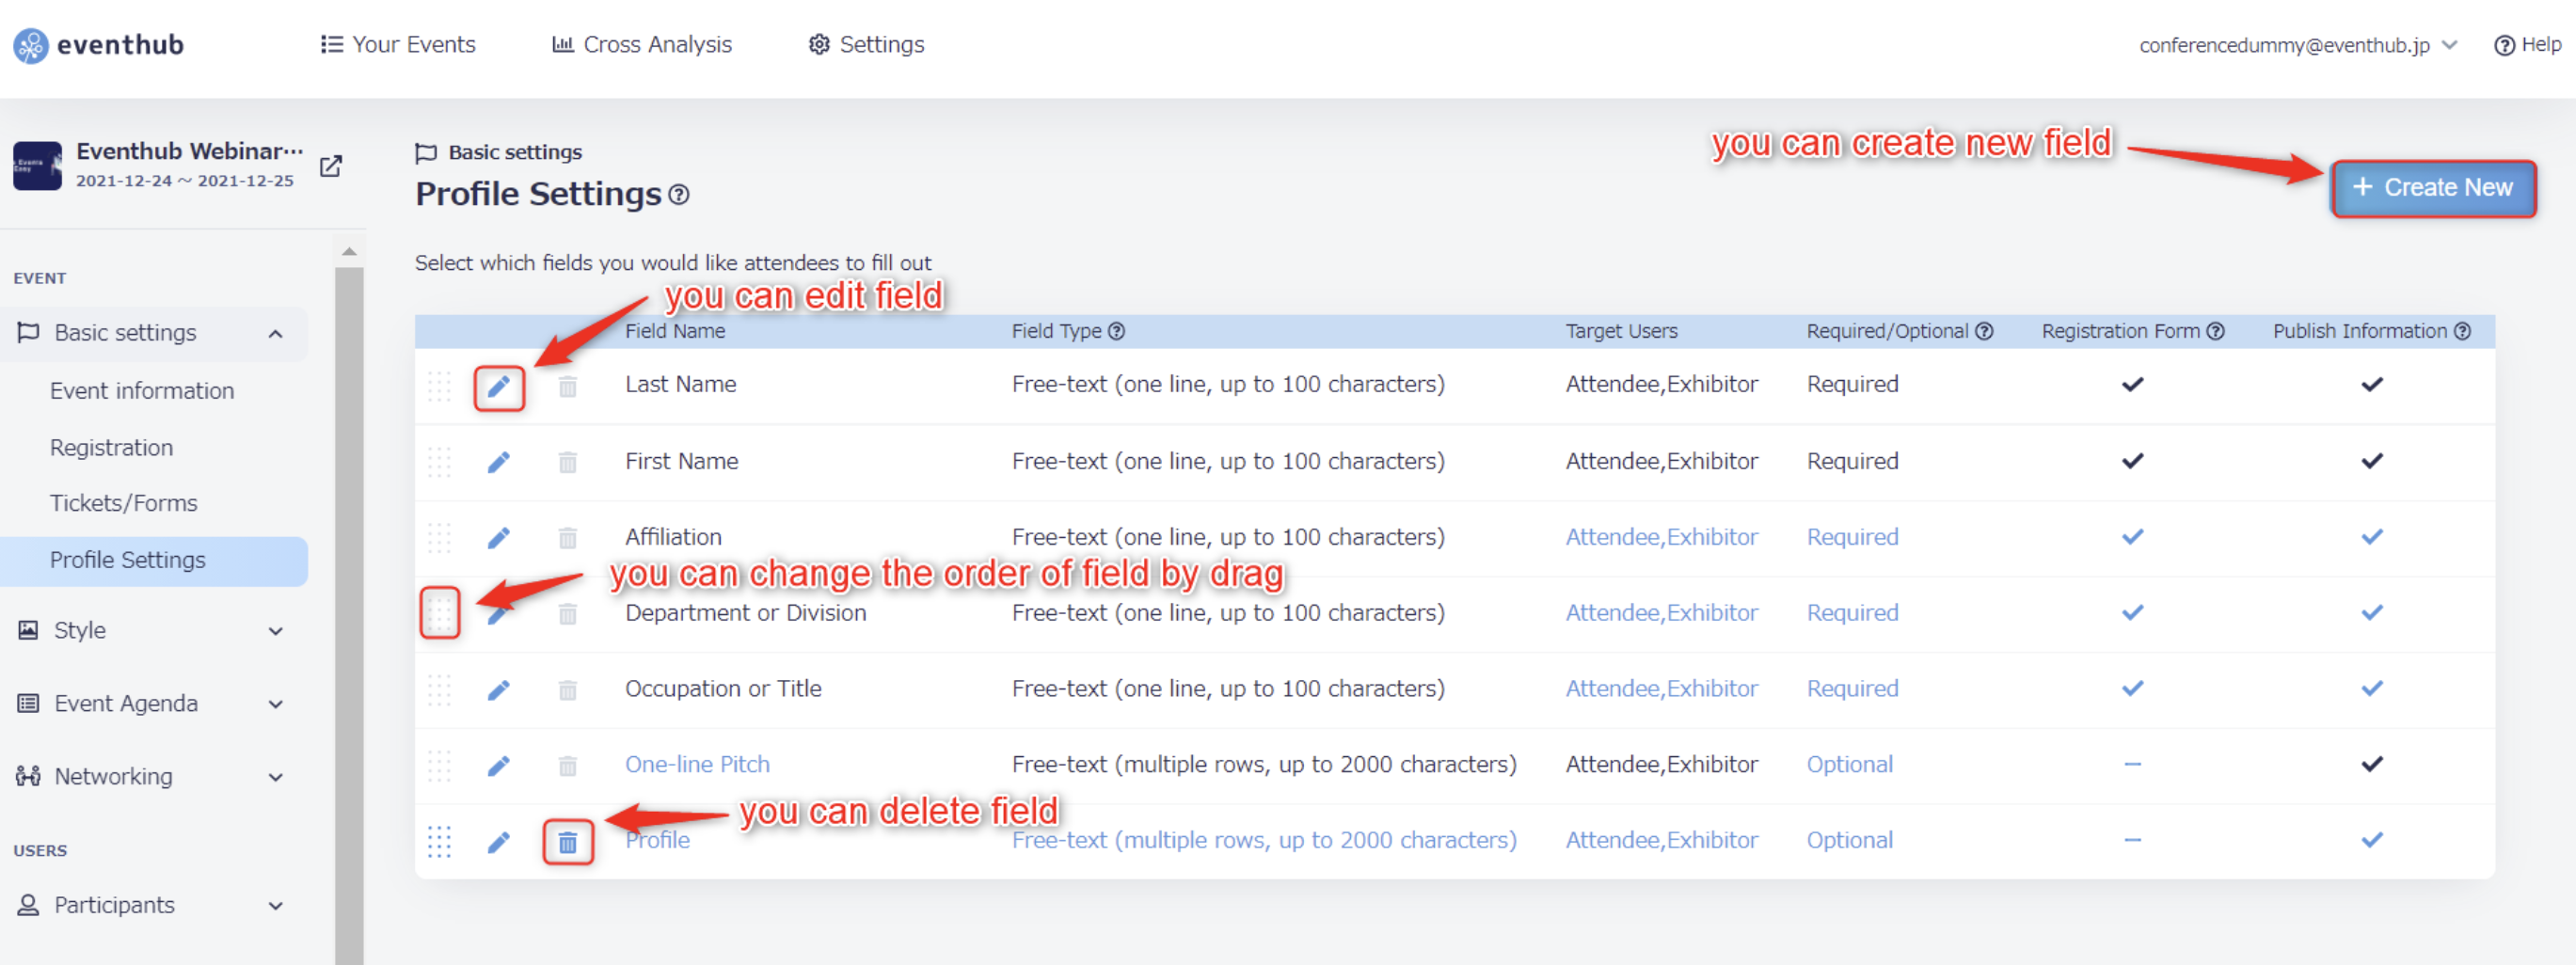
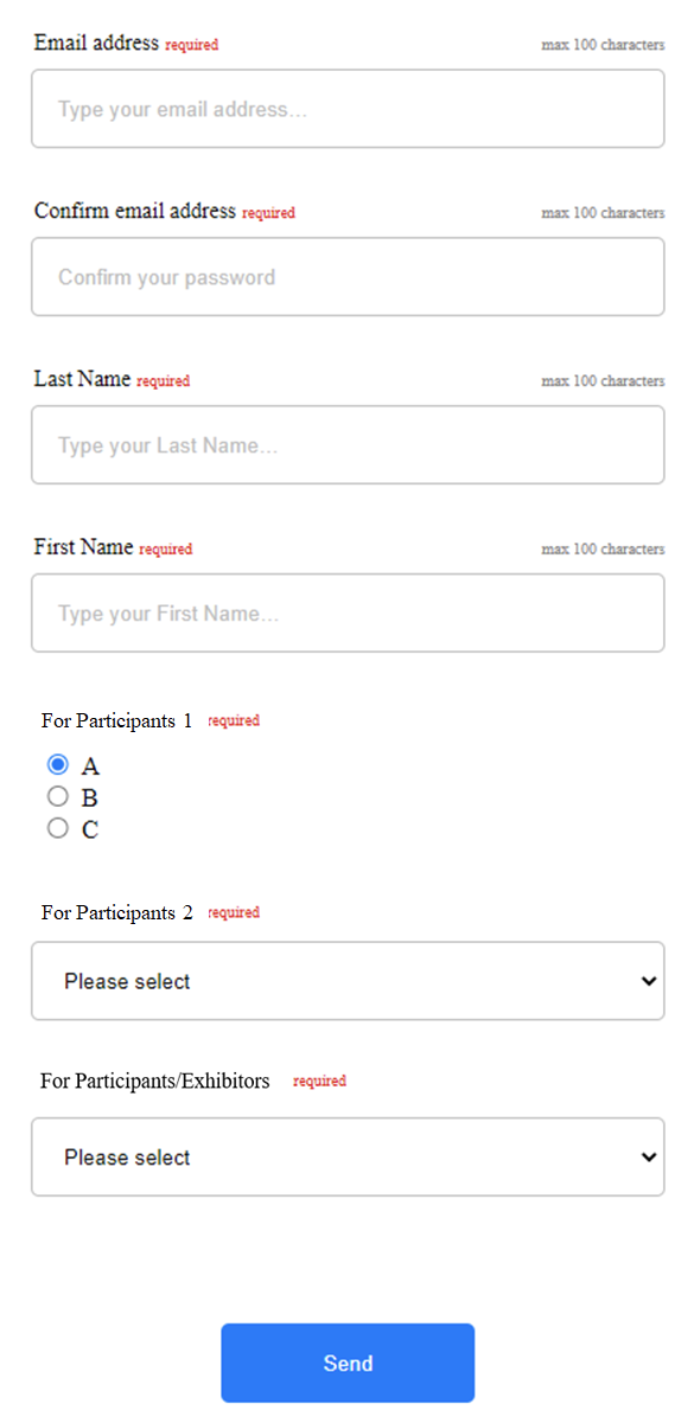
<attention>The fields displayed on tag-embedded registration forms are not separated between participants or companies, and 'intended users' cannot be set for these types of forms. All fields will be shown to all types of user. </attention>
The Terms of Use will also be displayed, so please do the following to set them up.
1. Go to 'Basic Settings' > 'Registration' to edit the Terms of Use.
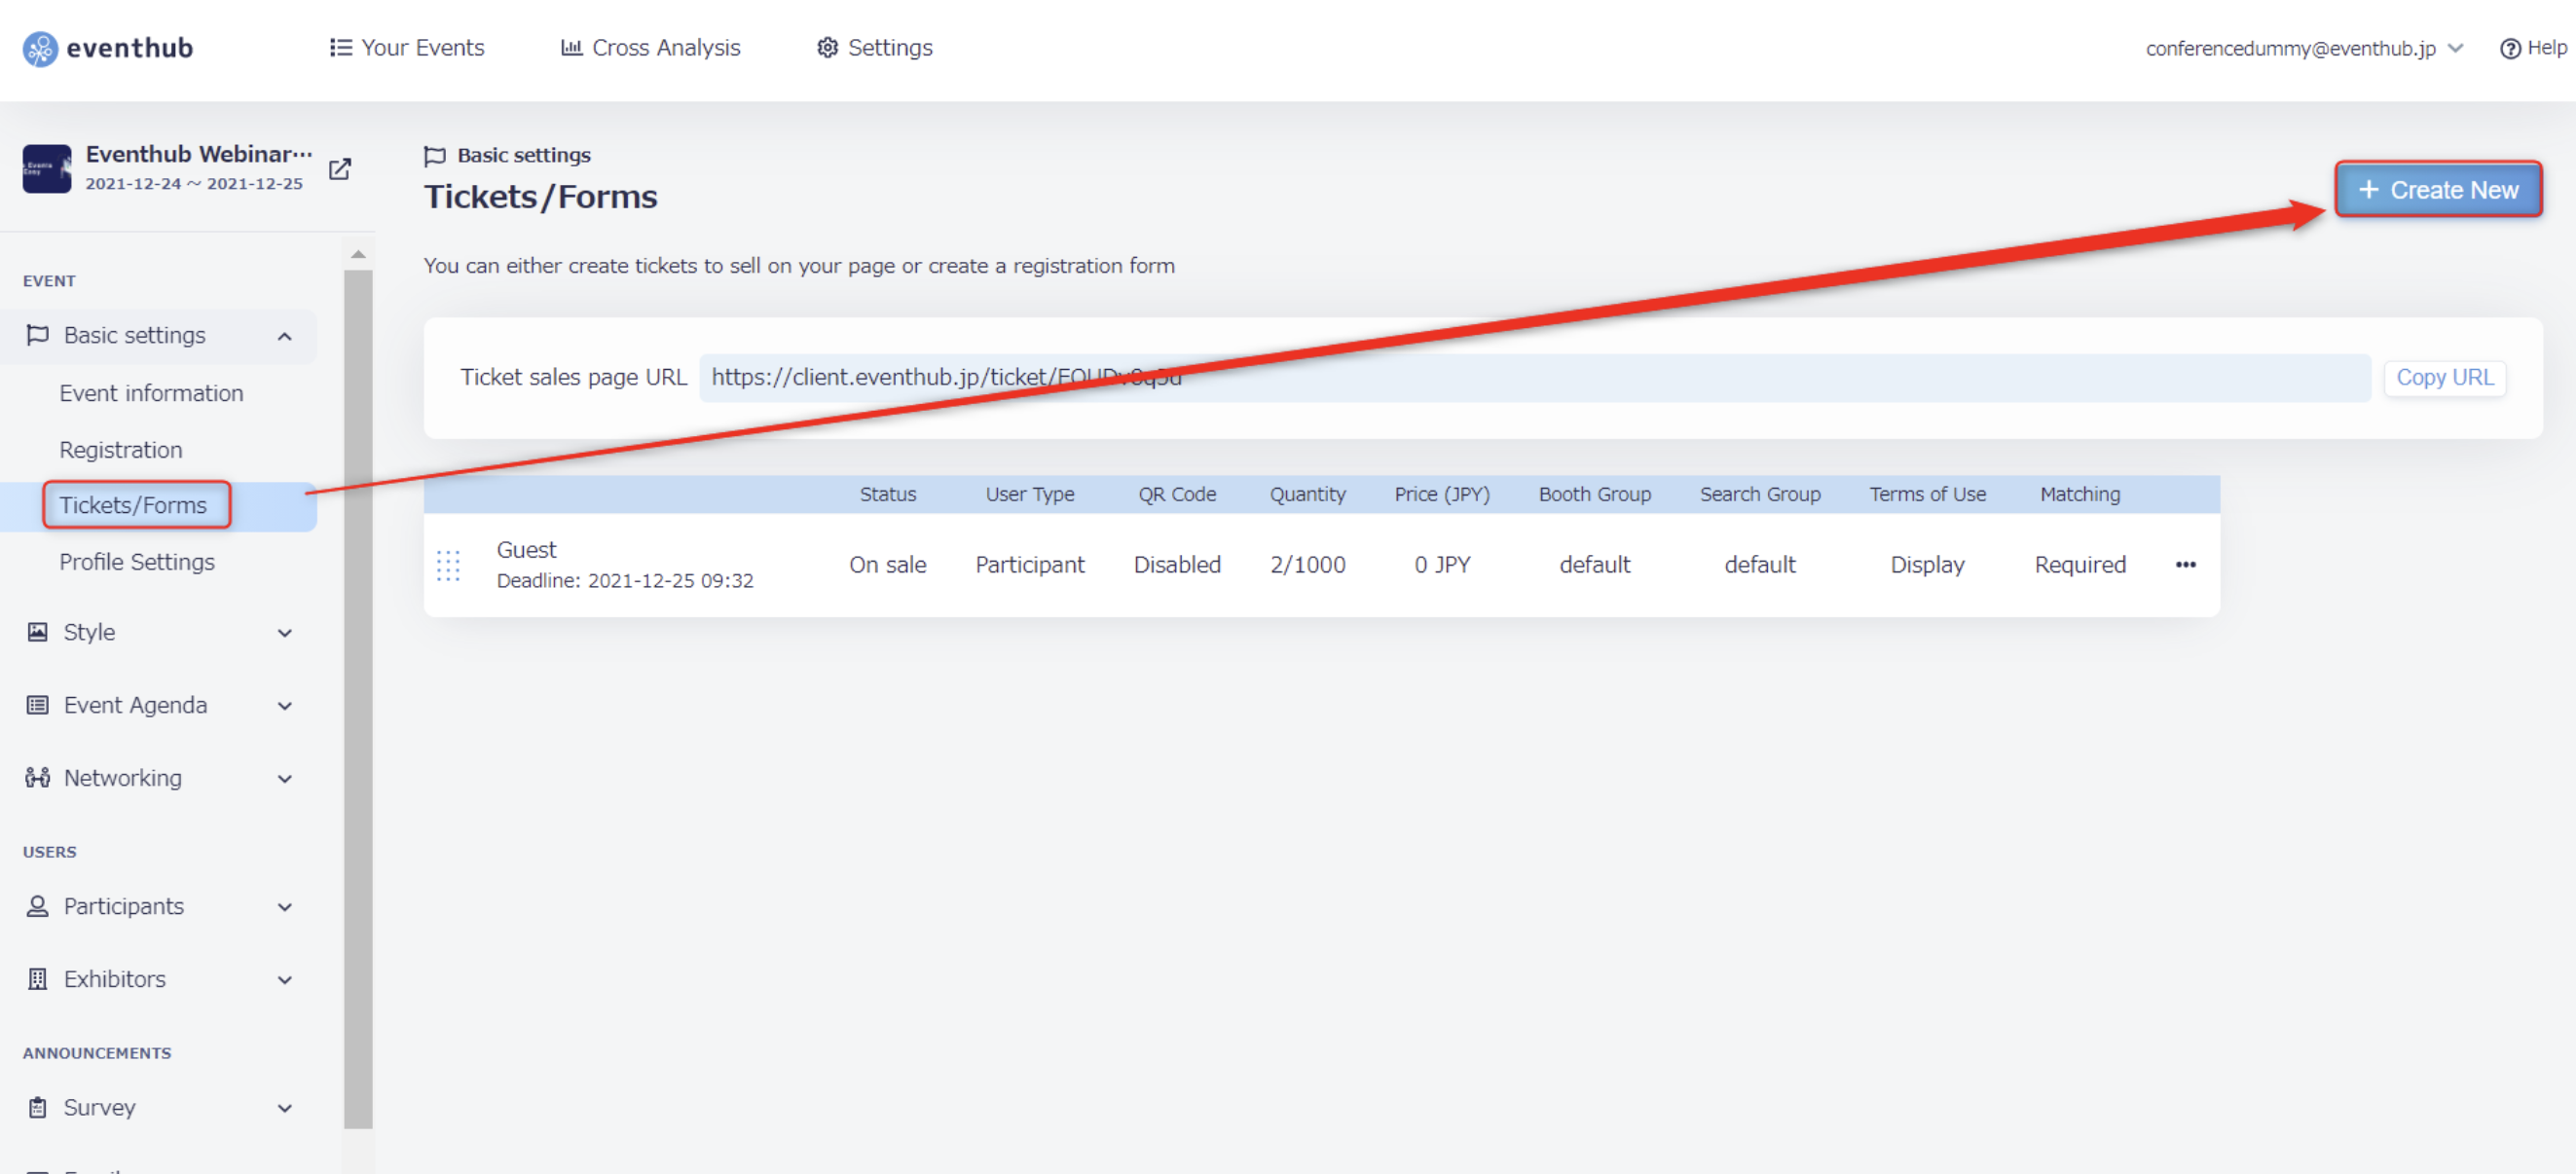
2. Under 'Tickets/Forms', click on the three action dots (···) to the right of the form name and click 'Edit' to edit the registration form you wish to embed.
3. Under 'Advanced Settings' > 'Terms of Use' click 'Display'.
2. Generate a tag
1. Under 'Basic Settings' > 'Tickets/Forms' click 'Create New'.
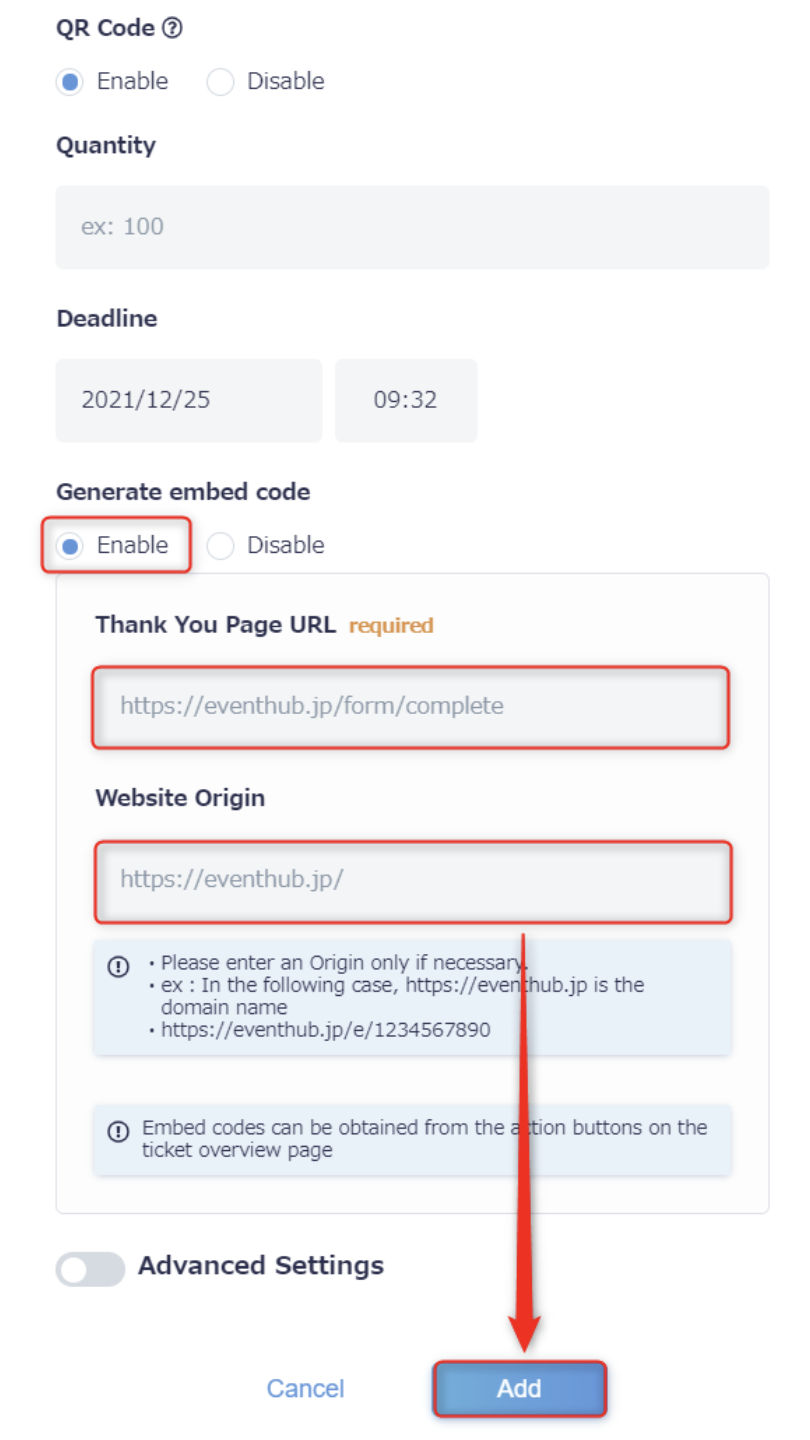
2. Enter the required ticket information. Please see Create a Free Ticket for more information on how to do this. Under 'Generate embed code', choose 'Enable'. Enter the URL for the Thank You Page and for the website on which you wish to embed and and click 'Add'.
*This feature cannot be used for paid tickets

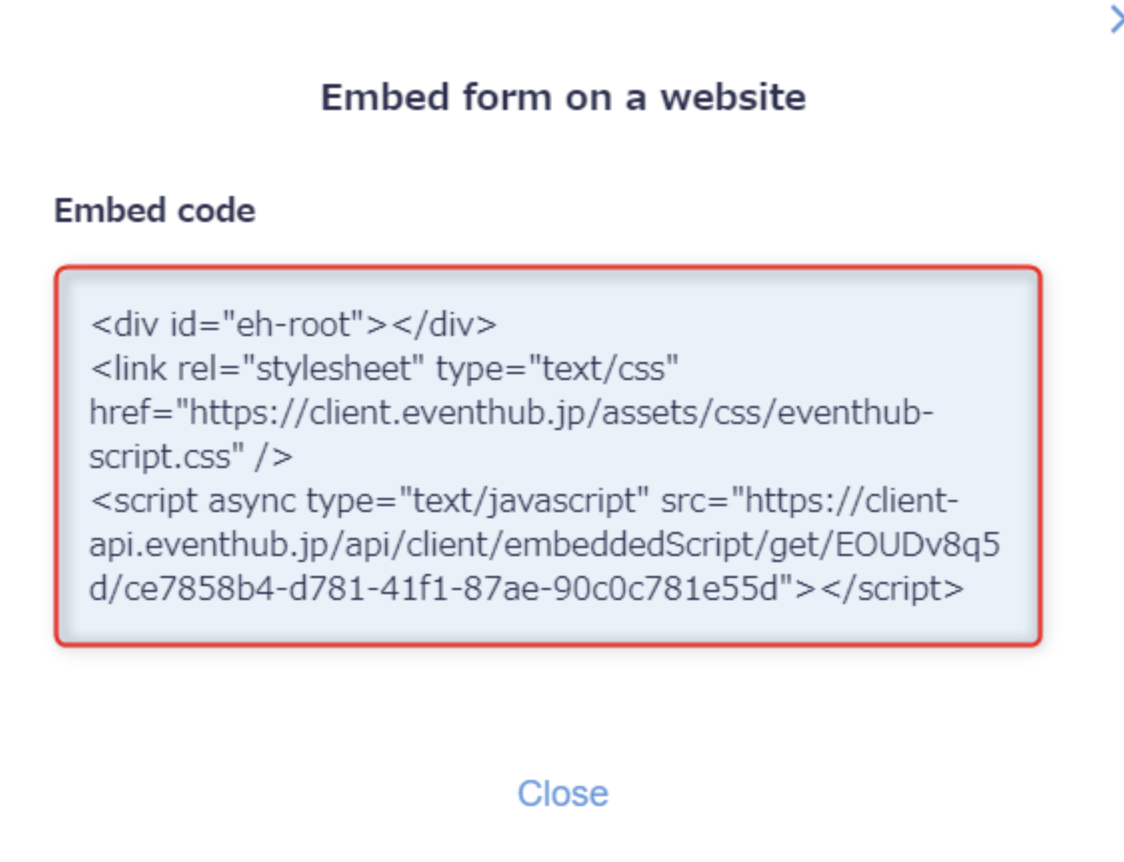
3. Click on the three action dots (···) next to the form you have just created and choose 'Embed code'.
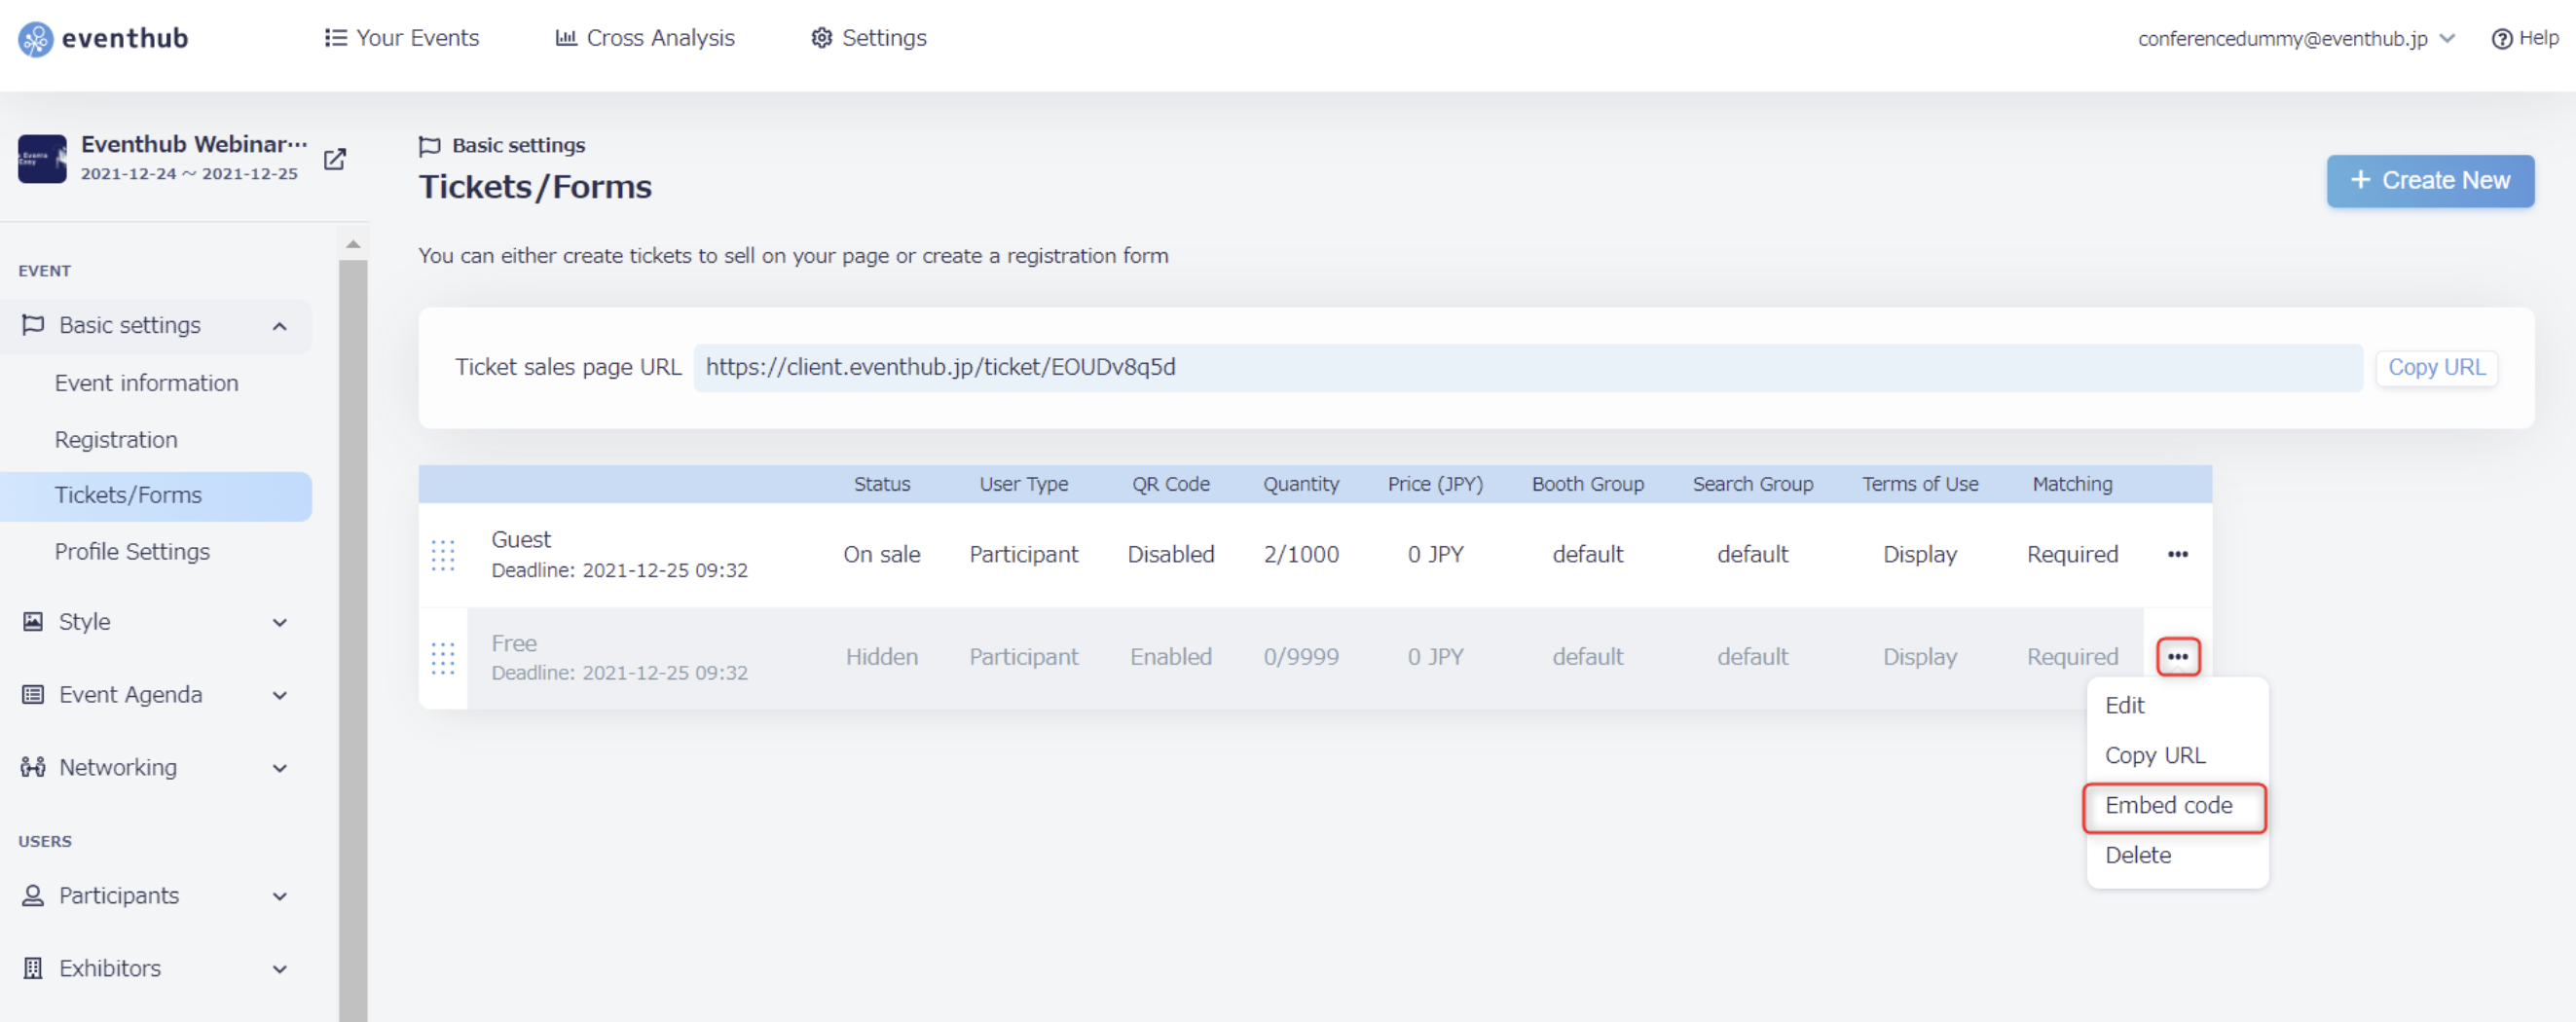
4. Copy the embed code and embed it into the registration form you have created.
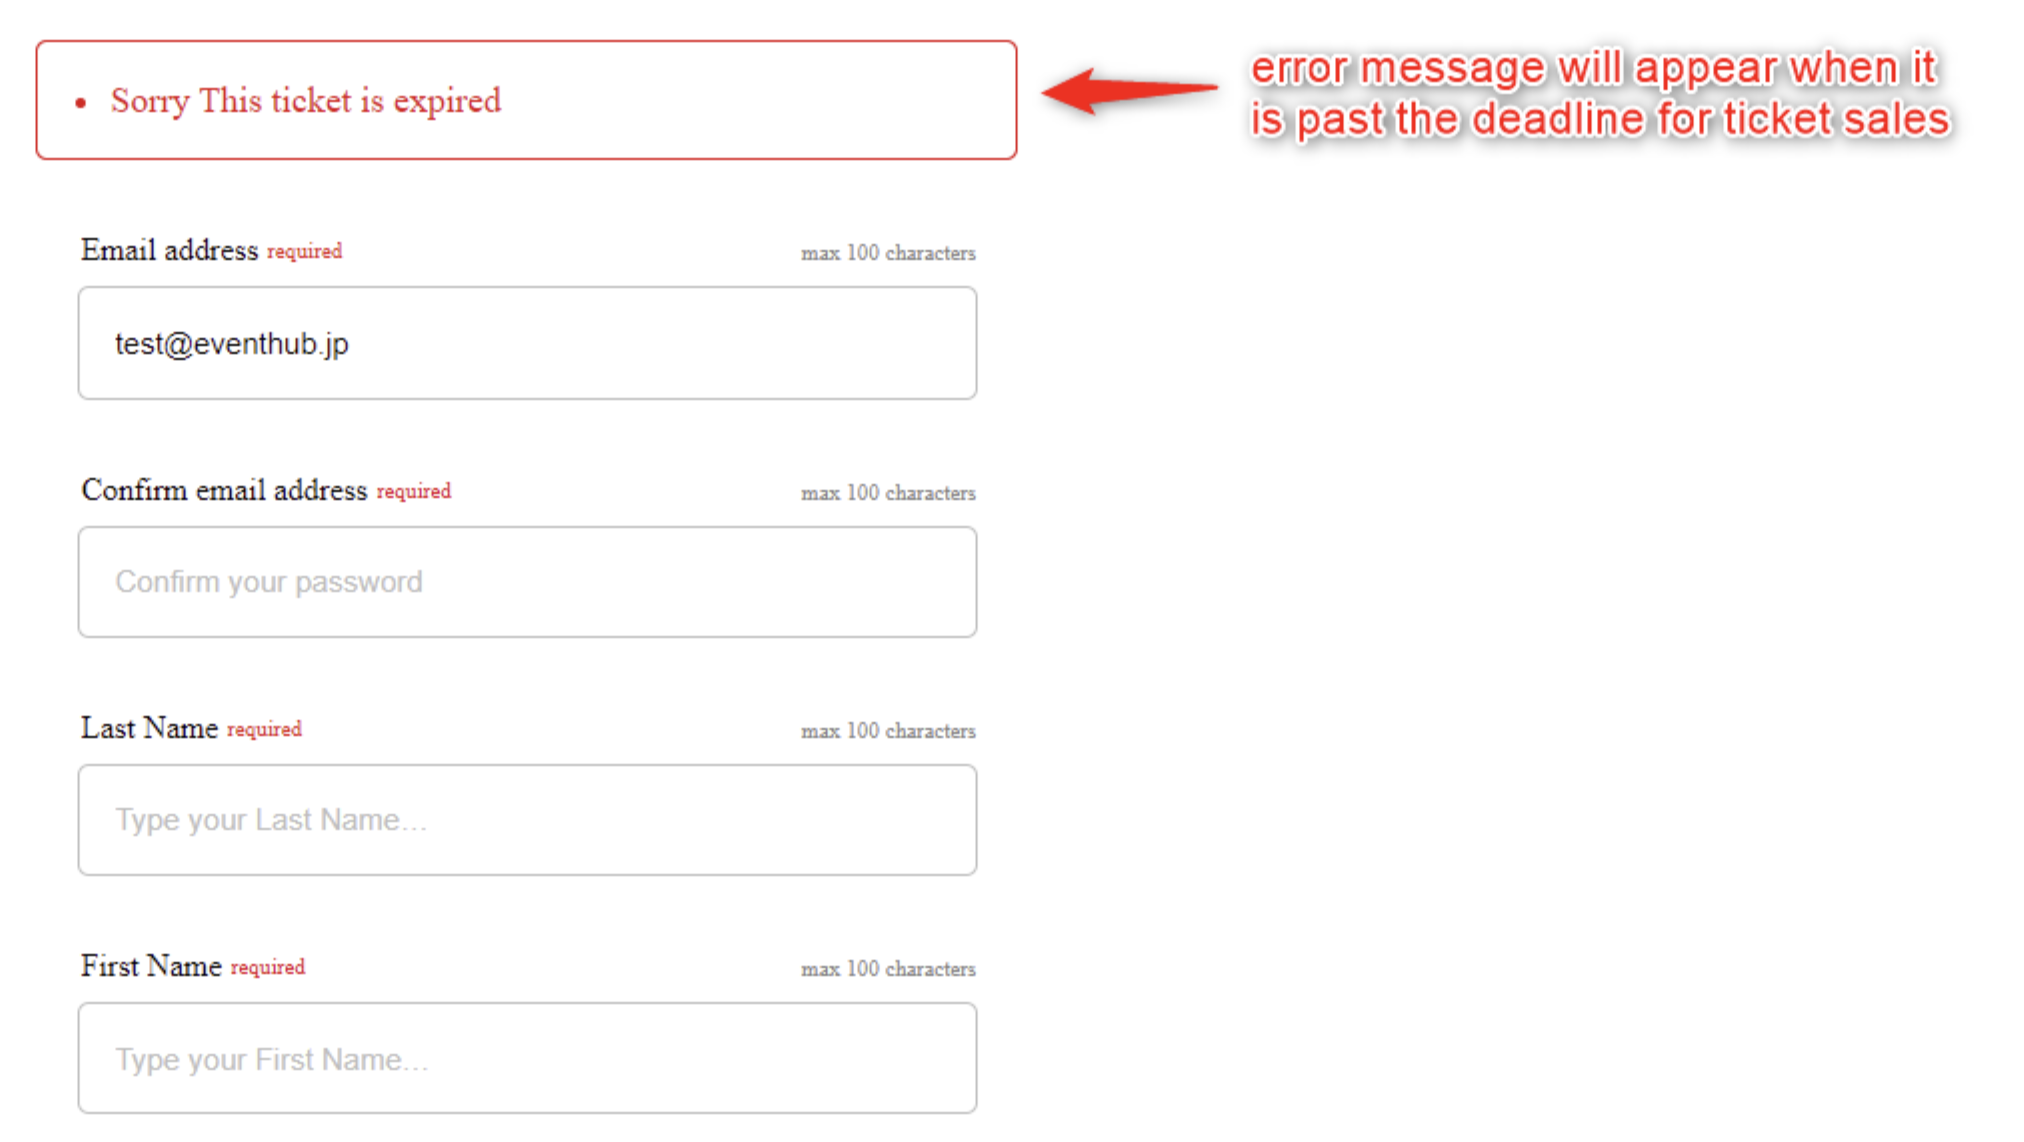
3. About the form deadline
The deadline for registration can be set when creating a new form. If someone tries to register after the deadline date and time, they will receive an error message.
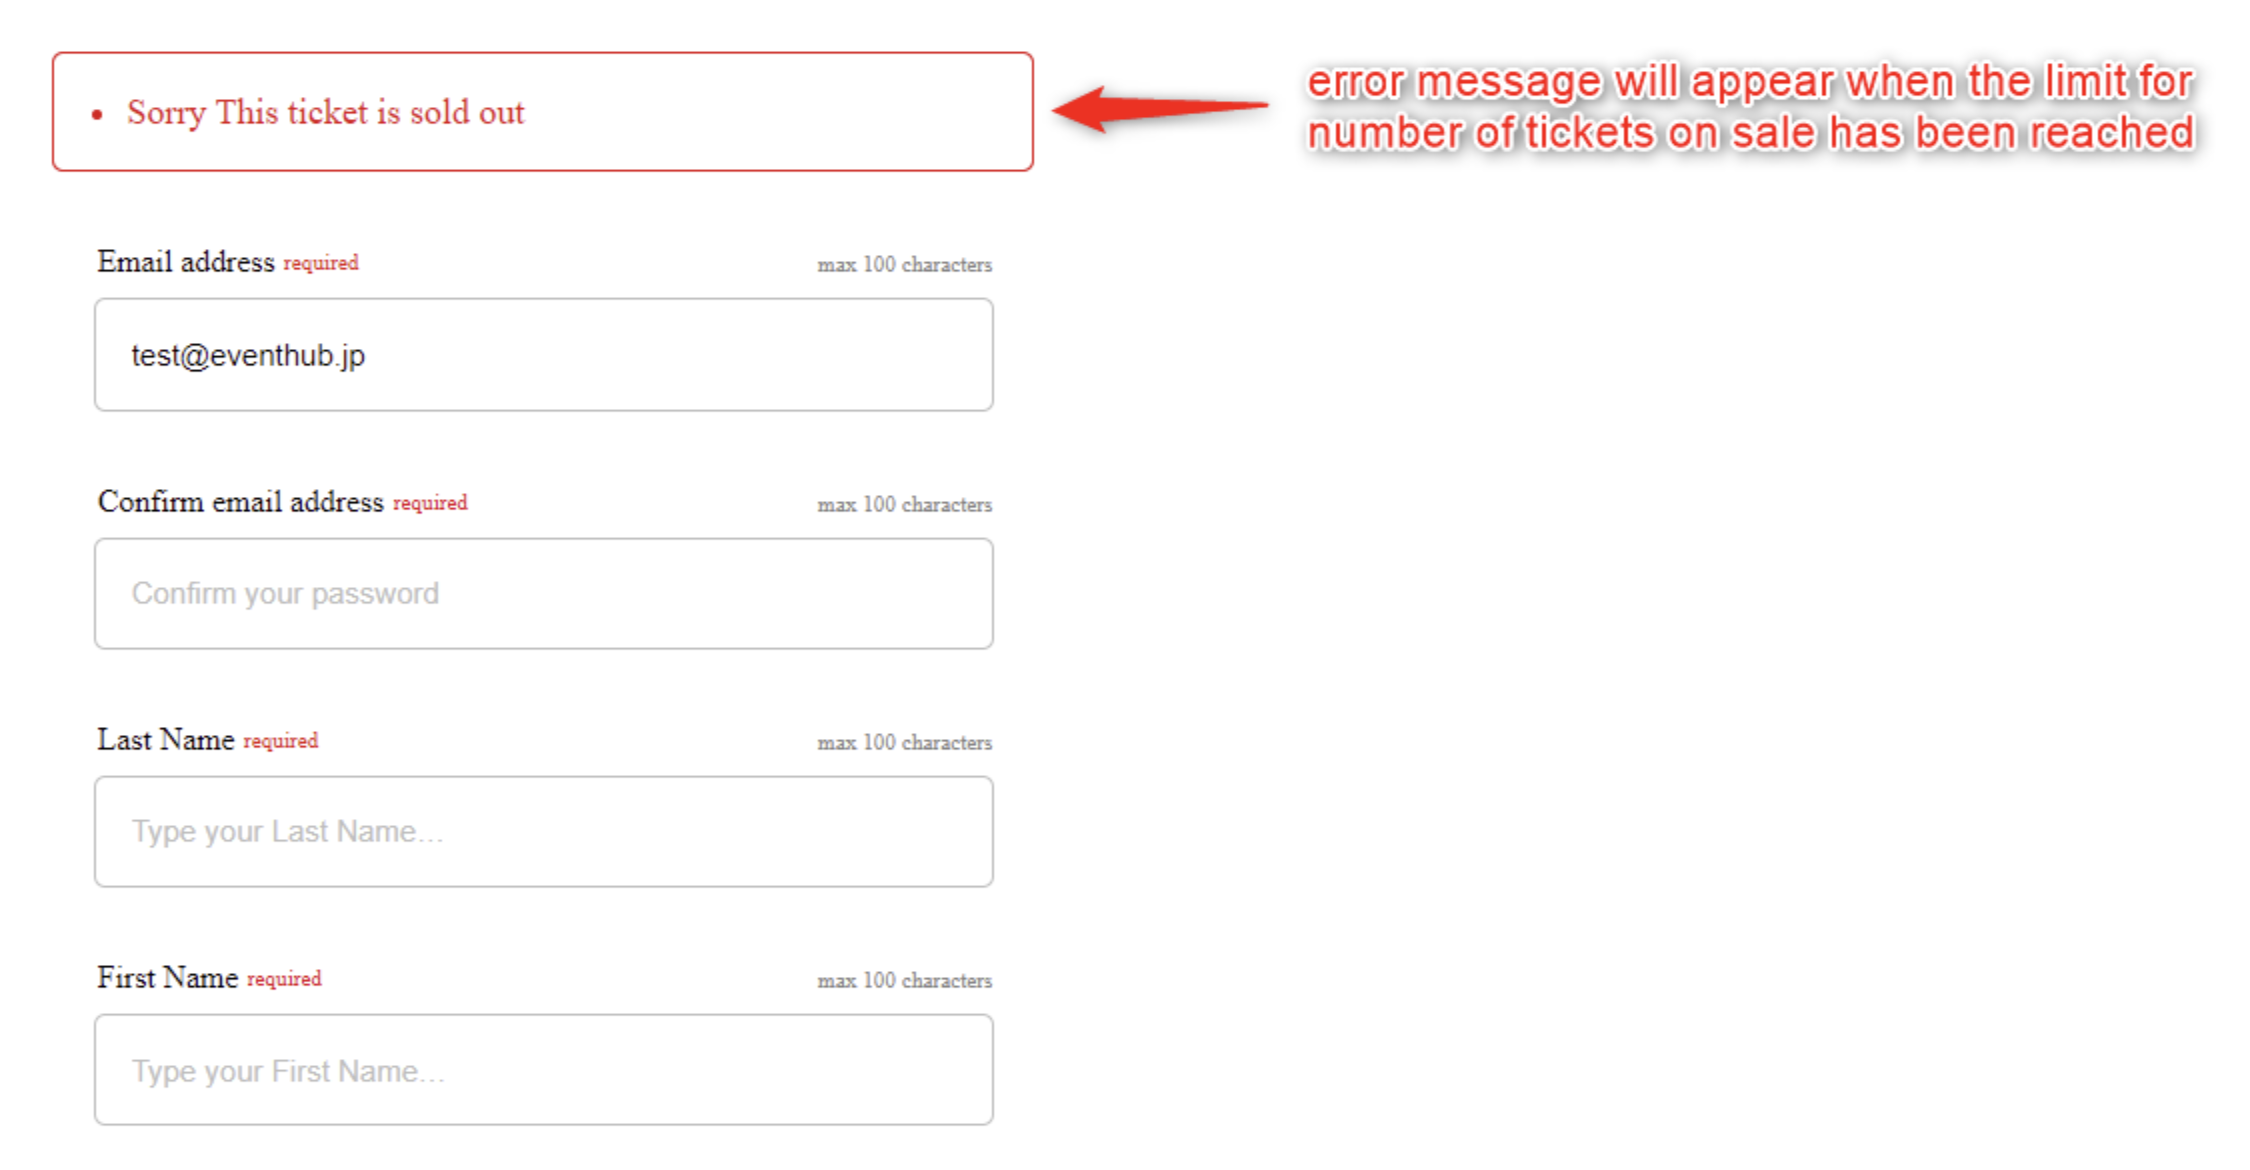
4. About registration limits
You can choose a maximum registration limit by setting the 'Quantity' when creating a ticket or form. If someone tries to register after the limit has already been reached, they will receive an error message stating that the ticket has been sold out.
5. Flow from registration to log in
1. Enter the required user information.
*Please note that this type of form does not require the user to set a password.
2. An invitation email will automatically be send from EventHub to the email address provided. Please click 'Log in'. *Please see Edit Automated Emails for more information on how to set up emails.
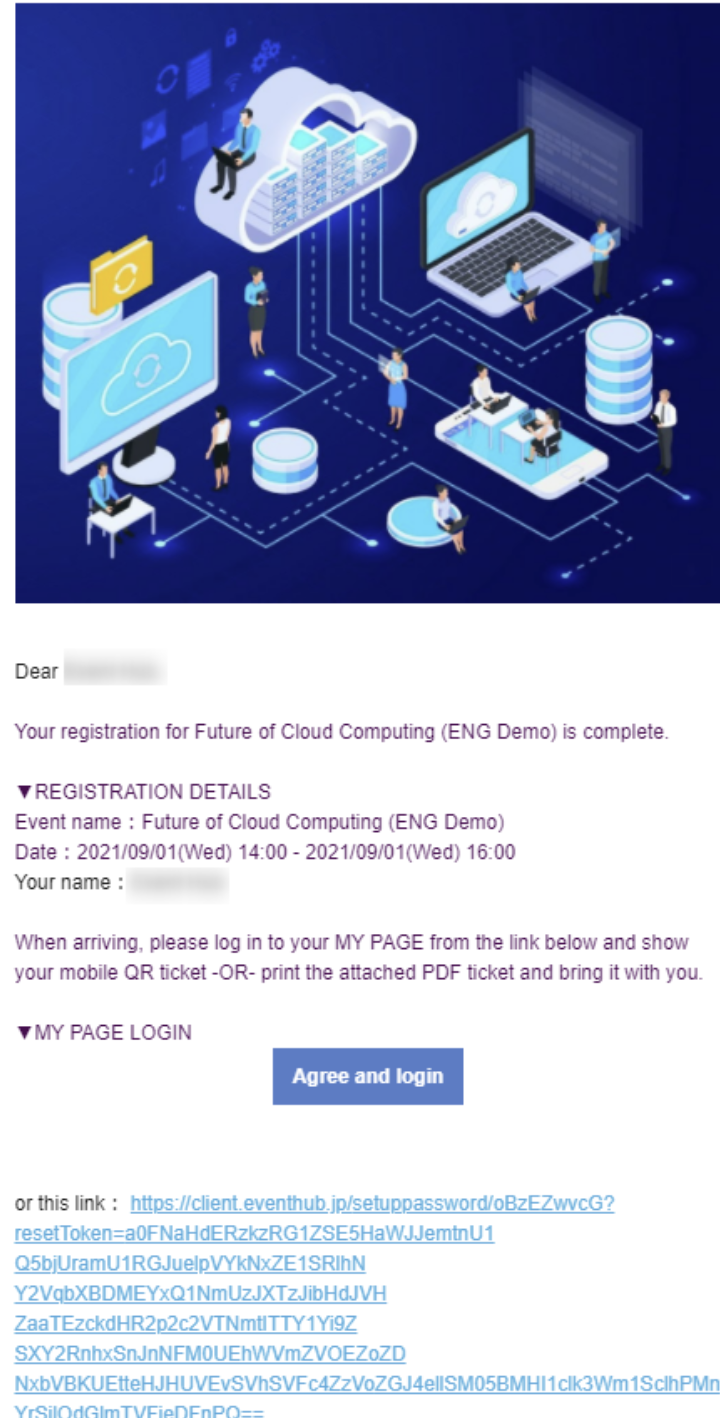
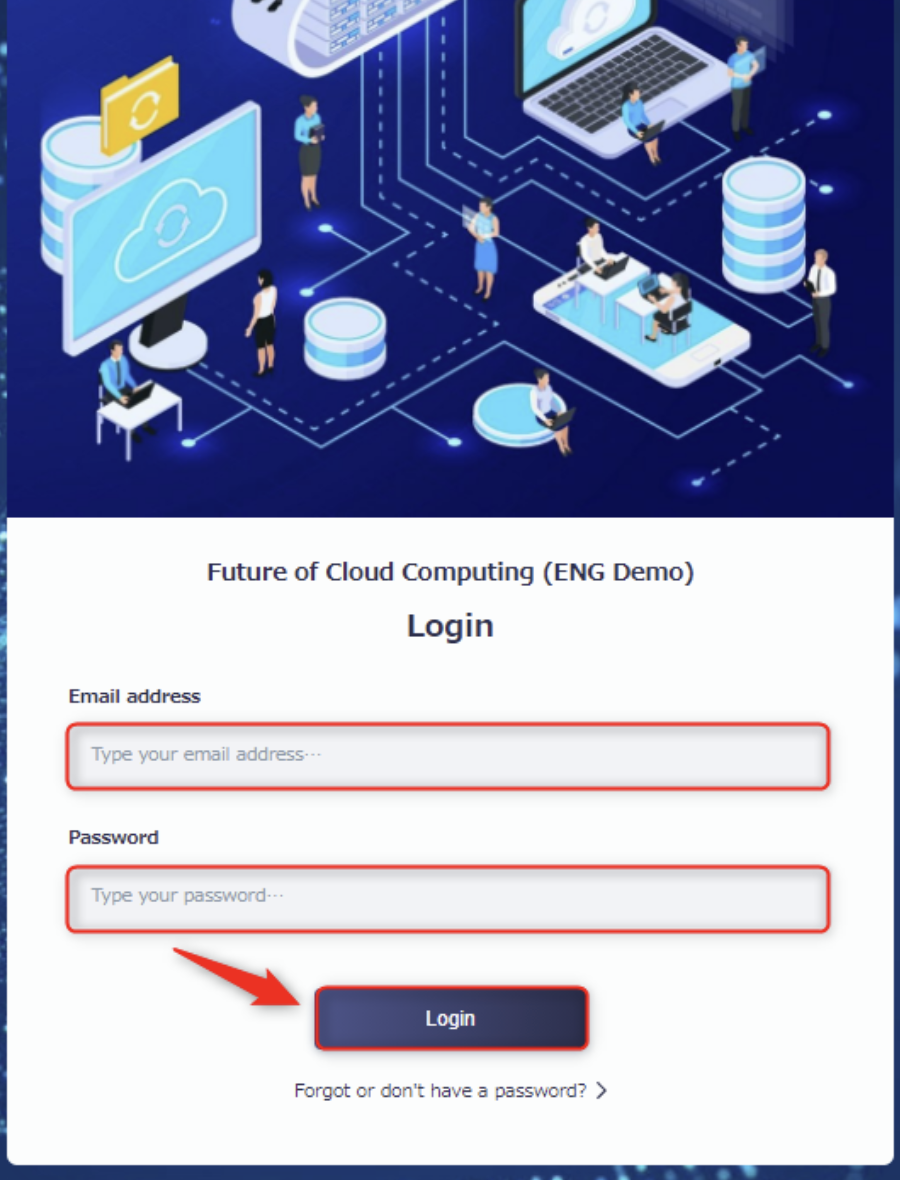
3. You will be directed to create a password, so please do so before clicking 'Log in'.
4. You will be directed to the event page.

6. About user lists
If a user registers through a form, their information will be collected and displayed under 'Participants' > 'User List' as below.
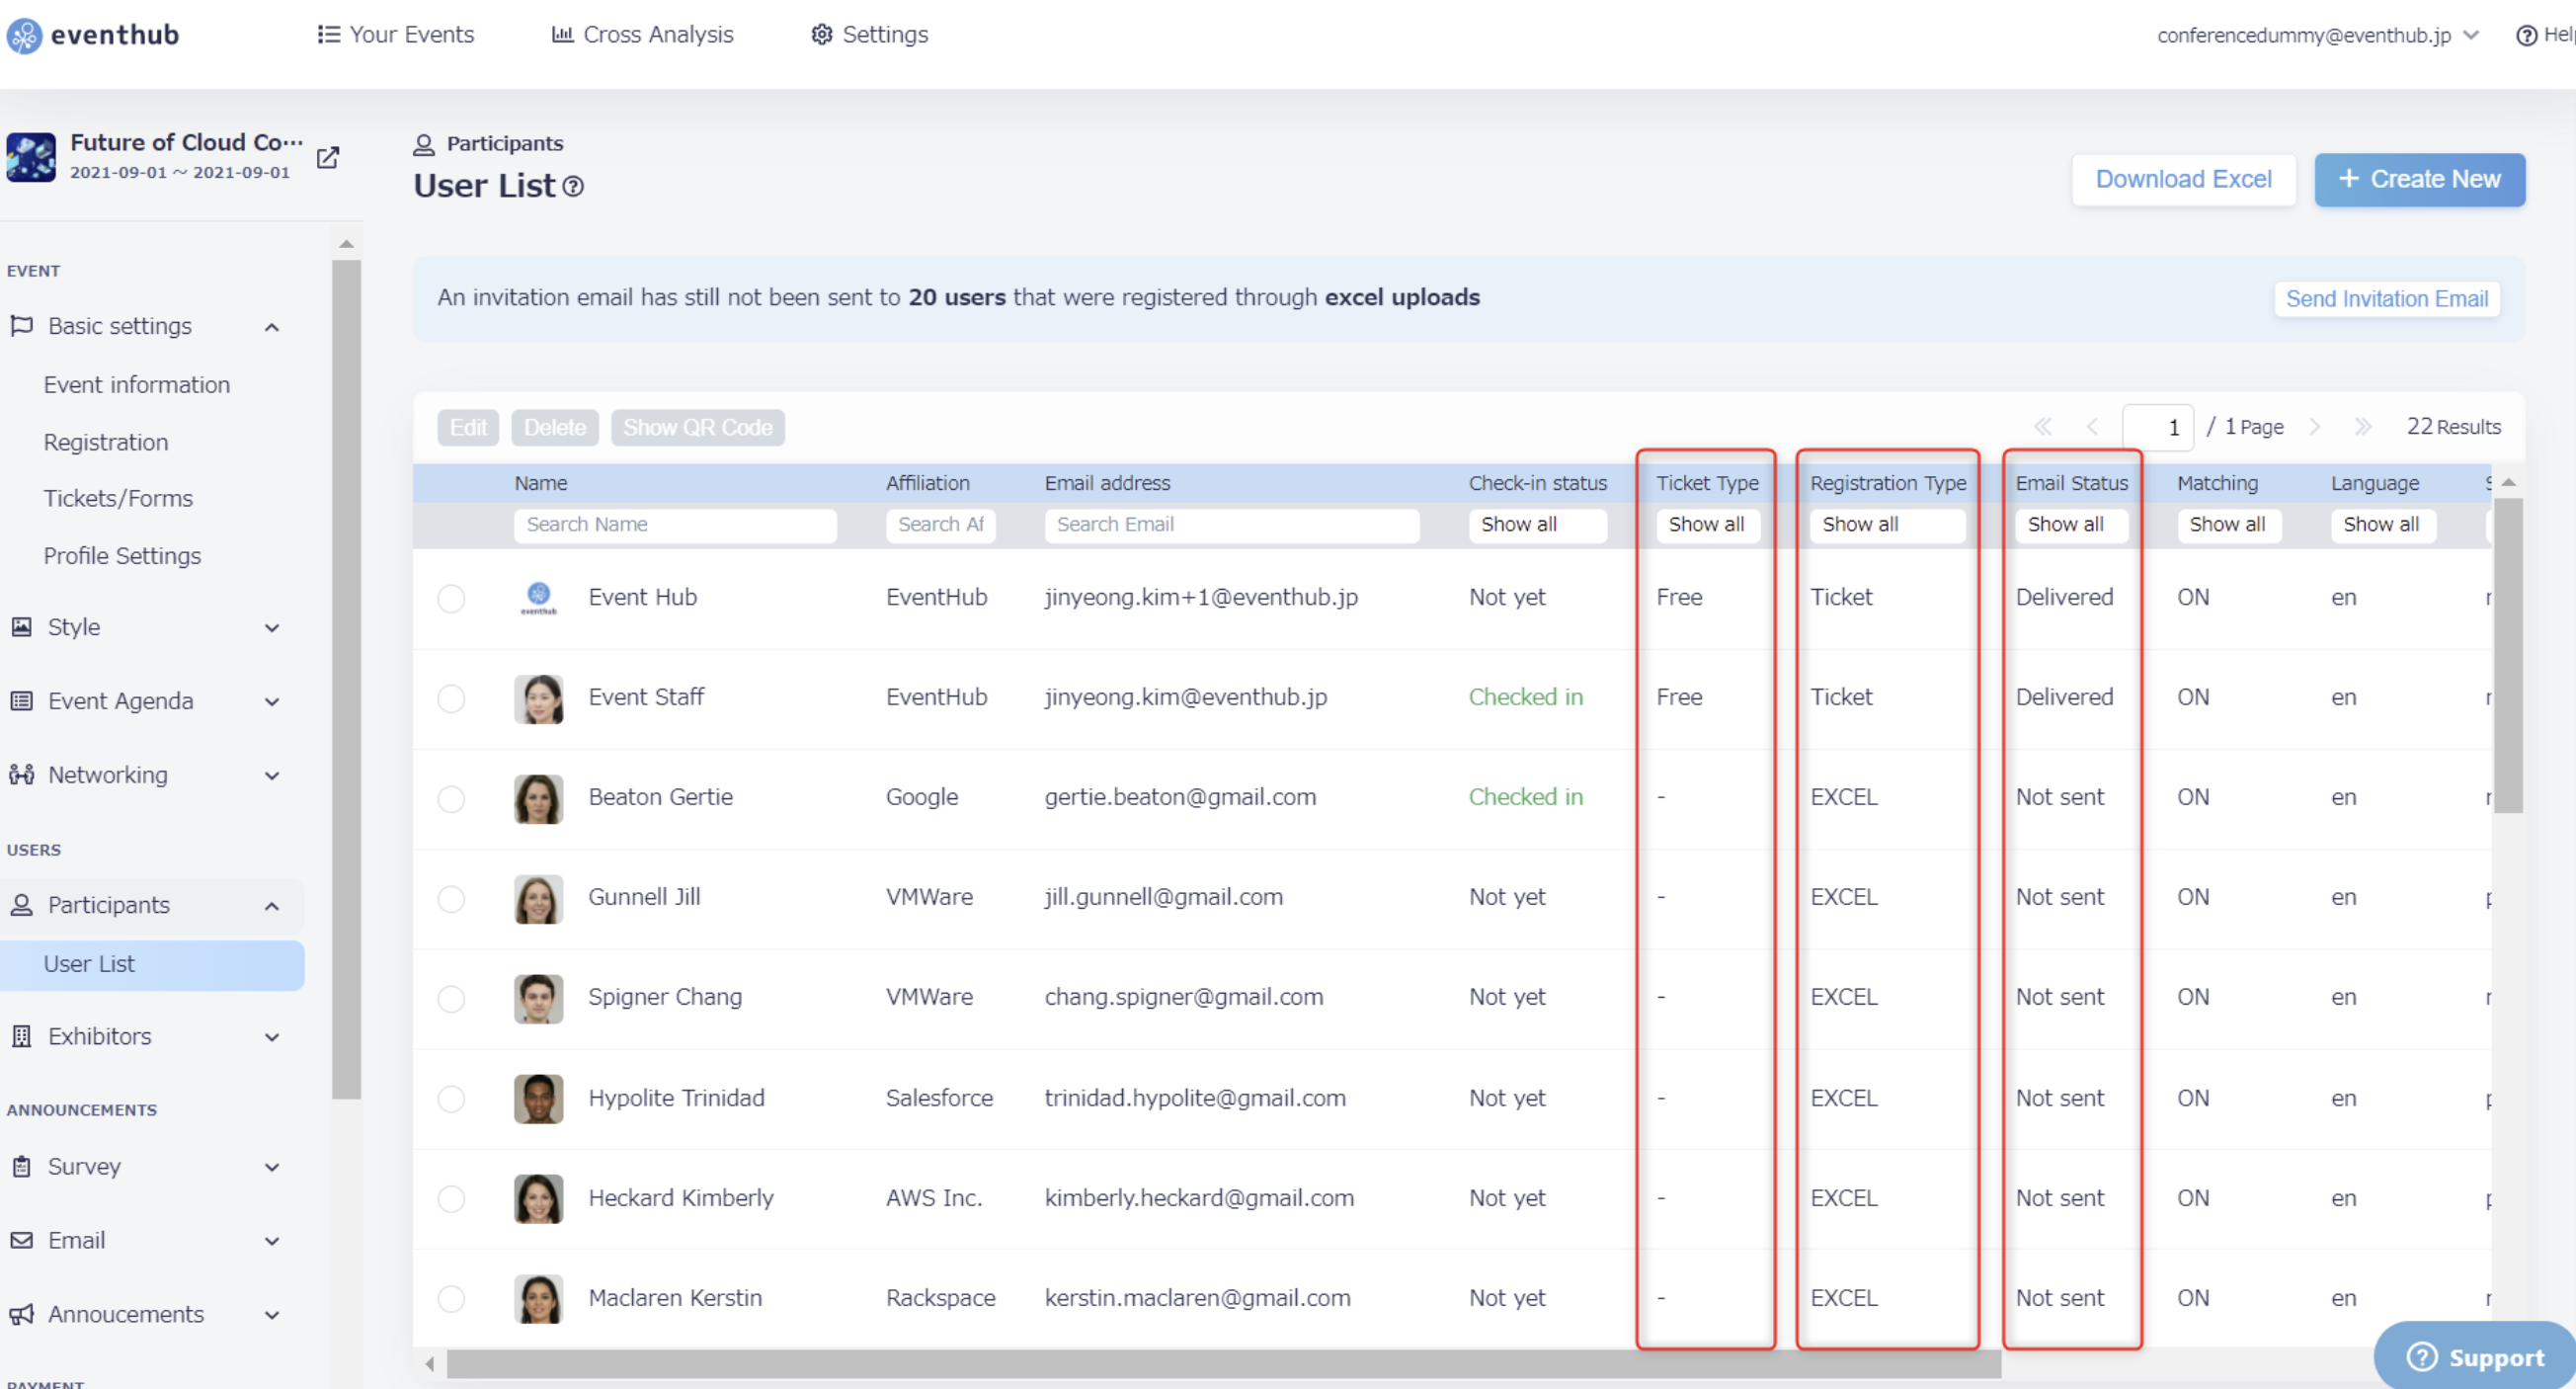
Ticket Type: Name of ticket/form
Registration: Type: Ticket
Email status: Delivered/Undelivered
<tips>Please check the below article for what to do when an email is shown as undelivered.
Why aren't users receiving invitation emails?</tips>
7. Things to note
- Please watch for design errors
A default CSS has will be set with the tag-embedded registration form. However, design errors may occur depending on the CSS of the site you wish to embed,
The CSS set with the tag-embedded registration form has been designed so that it should not effect the CSS of the website, so should a design error occur, please modify the website CSS separately.
- All information will be displayed to every type of user
The fields displayed on tag-embedded registration forms are not separated between participants or companies, and 'intended users' cannot be set for these types of forms.
- After the event ends
The tag-embedded registration form will no longer display once the event closing date you have set has passed. If you notice the registration form is no longer being displayed, please double-check the event closing date.